• Skip to primary navigation
  • Skip to content
  • Skip to primary sidebar

Your Mom's Vegan

Plants to Plate ...recipes, encouragement and guidance for your plant based way of eating.

  • Home
  • Start Here
  • Recipe Index
  • Articles
  • How Do I…?
  • Contact Me
  • Resources

Recipes

Quick Vegan Bulgogi Sauce

January 26, 2023 by Trish Hall 2 Comments

This Quick Vegan Bulgogi Sauce is easy to make and will give all your Asian recipes a fantastic flavor boost.

No blog blather today…just the recipe that you all have been asking me to post.


Print
Quick Vegan Bulgogi Sauce

This Quick Vegan Bulgogi Sauce is easy to make and will give all your Asian recipes a fantastic flavor boost. 

Course: Sauce
Cuisine: Asian
Keyword: Quick Vegan Bulgogi Sauce
Ingredients
  • 1 cup low sodium tamari (or soy sauce if you don't need gluten-free)
  • 1/4-1/3 cup date sugar or sweetener of choice
  • 8 oz can of pineapple juice
  • 1/2-1 tsp garlic powder
  • 1/2-1 tsp onion powder
  • 1/2 tbsp Mirin (sweet rice seasoning) optional, but highly recommended.
  • 1 tbsp rice vinegar
  • 1 tbsp sesame seeds (crushed a bit)
  • 2 tbsp water
  • 3 tbsp corn starch
  • 1/4-1 tsp gochujang paste (optional)
Instructions
  1. Add tamari, sugar, pineapple juice, garlic powder, onion powder, Marin, and rice vinegar to a medium saucepan. Whisk until blended well. Heat on medium heat.

  2. In a small bowl, whisk the cornstarch and water. Set aside.

  3. Add the crushed sesame seeds to the sauce and the Gochujang (if using) and bring the sauce to a low boil.

  4. Add the cornstarch slurry and whisk constantly until the sauce thickens. It should still be easily pourable.

  5. Use the sauce while still warm or store it in a glass bottle or jar in the fridge.
Filed Under: Condiments, Sauces Tagged With: Asian, bulgogi, no fish, sauce, Vegan

Oil-free Asian Salad with Chickpeas

July 25, 2022 by Trish Hall Leave a Comment

***This is a temporary posting for all the people who asked on Facebook for this recipe. I’ll add photos and more detailed instructions another time.***

This versatile Oil-Free Asian Salad with Chickpeas is tasty and very healthful. Make it with your favorite cabbage or Brussels sprouts.

Print
Oil-Free Asian Salad with Chickpeas

This versatile Oil-Free Asian Salad with Chickpeas is tasty and very healthful. Make it with your favorite cabbage or Brussels sprouts. 

Course: Main Course, Potluck, Side Dish
Cuisine: American, Asian
Ingredients
  • 4 cups Napa cabbage (or your favorite cabbage or Brussels sprouts), shredded
  • 2 cups broccoli, chopped into bite sized pieces and grate the stem
  • 1/4-1/3 cup sliced green onion, all the white and a bit of the green part
  • 1 cup grated carrot
  • 1.5 cups chickpeas, rinsed
  • 1/2 cup sliced almonds optional
Dressing
  • 1/4 cup toasted sesame seeds use less if you want lower fat, or omit
  • 1/4 cup maple syrup or date paste
  • 1/4 cup rice vinegar
  • 1/4 cup tahini
  • 1/4 cup tamari (or soy sauce if gluten-free isn't necessary)
  • 1-2 cloves garlic Or use 1 tsp powder
  • 1 tsp grated fresh ginger Or use 1/2 tsp powder
  • 1 tsp Sriracha optional
Instructions
  1. In a food processor with a shredding blade, or by hand with a knife, shred the cabbage or Brussels sprouts.

  2. Chop the broccoli into bite sized pieces and grate the stem.

  3. Slice the green onion.

  4. Grate the carrot.

  5. Drain and rinse the chickpeas.

  6. Add everything above to a large bowl and toss well.

  7. Add the dressing and toss well.

  8. Add most of the sliced almonds and lightly toss.

  9. Serve and sprinkle with remaining almonds.

Dressing
  1. Lightly toast the sesame seeds in a dry pan. This isn't absolutely necessary, but it does bring added flavor.

  2. Place all ingredients into a blender or a jar and blend well.

Filed Under: Main Dish, Potluck, Recipes, Salad, Side Dishes Tagged With: Asian, coleslaw, No oil, Oil free, Slaw

Seedy Flax Crackers~Oil-Free & Gluten-Free

April 29, 2022 by Trish Hall Leave a Comment

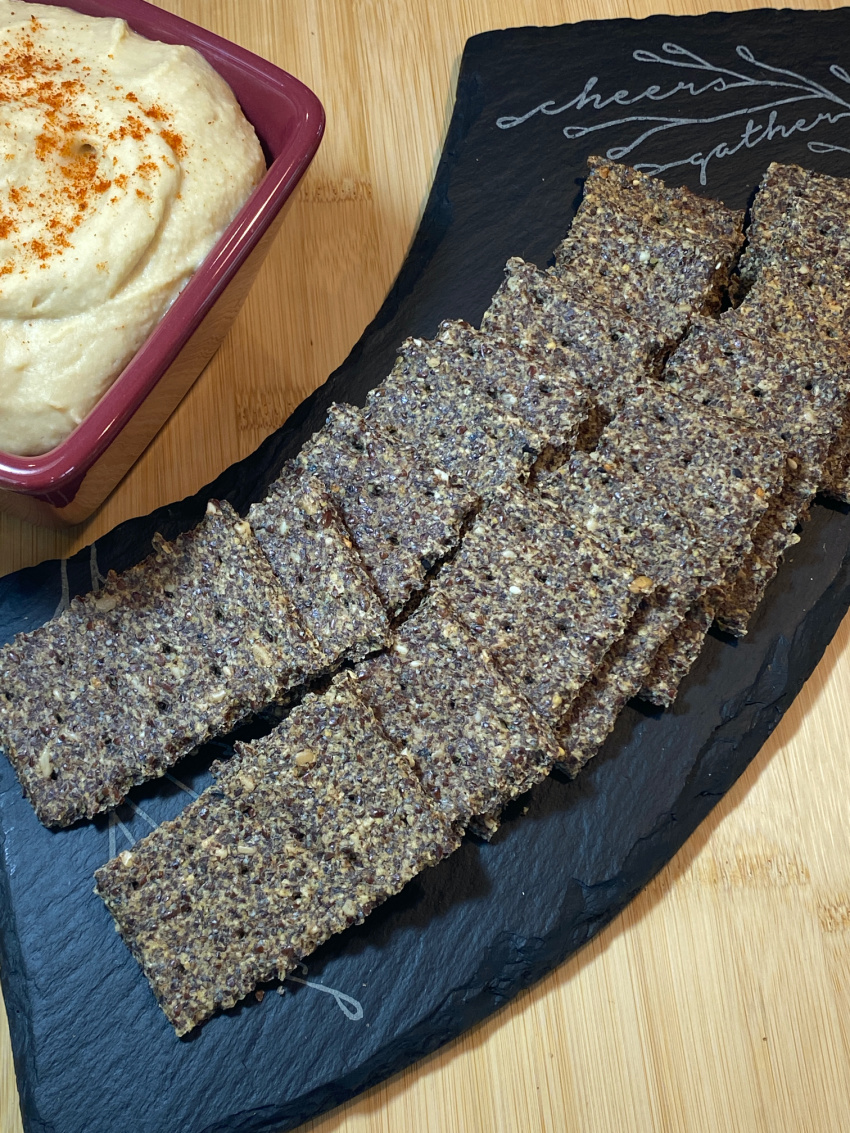
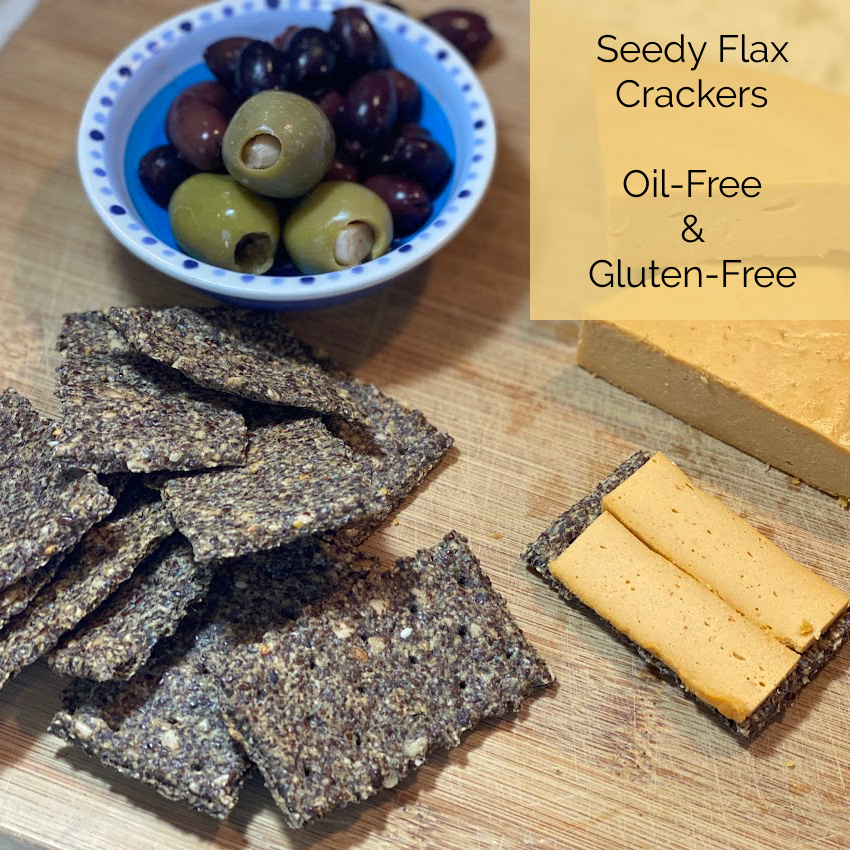
These Seedy Flax Crackers~Oil-Free & Gluten-Free have just two basic ingredients and you can add in any nuts, seeds, or seasonings that you like.

Seedy Flax Crackers~Oil-Free & Gluten-Free

If you are following a gluten-free and oil-free way of eating, you know how hard it is to find crackers without those ingredients. I have only found one brand that makes crackers without oil and gluten ingredients and they are expensive! So I decided to try making my own and this is it!

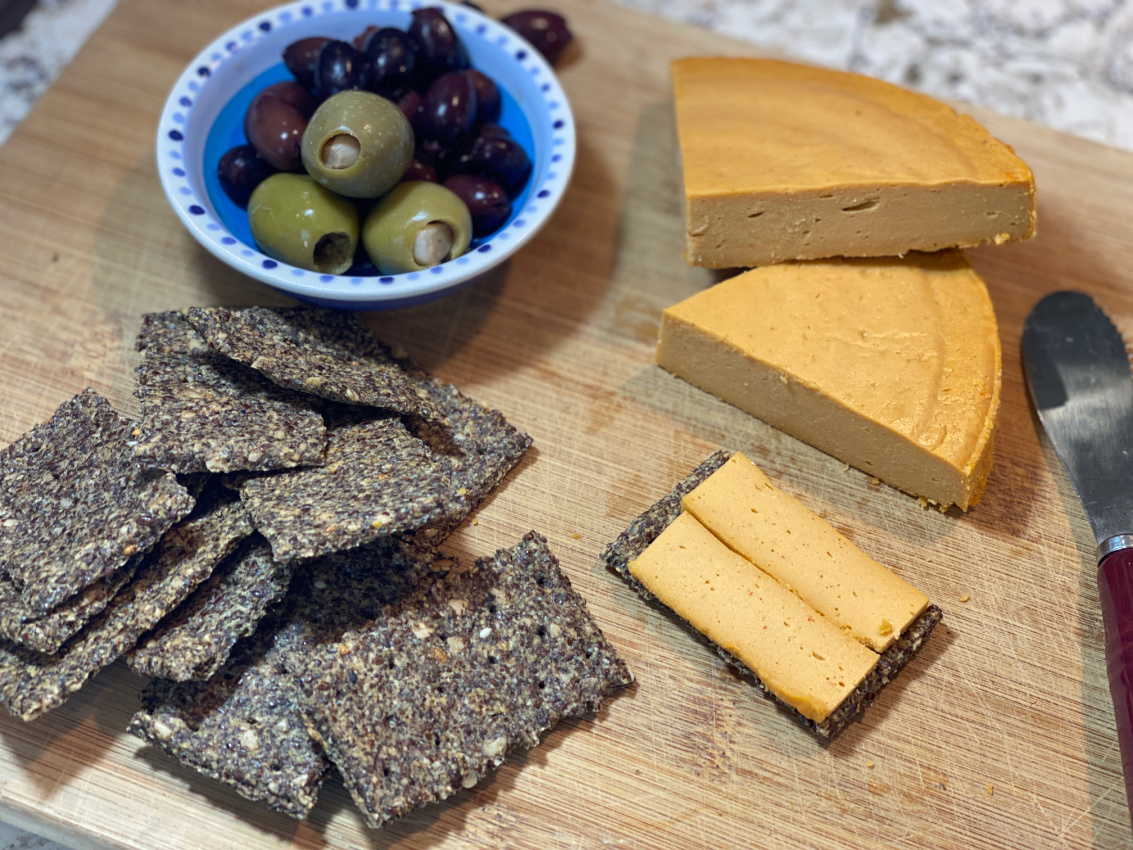
They are crispy and hold up well for dipping in hummus or as a base for cheese.

Scroll down to the recipe box if you don’t need to see photos of the process.

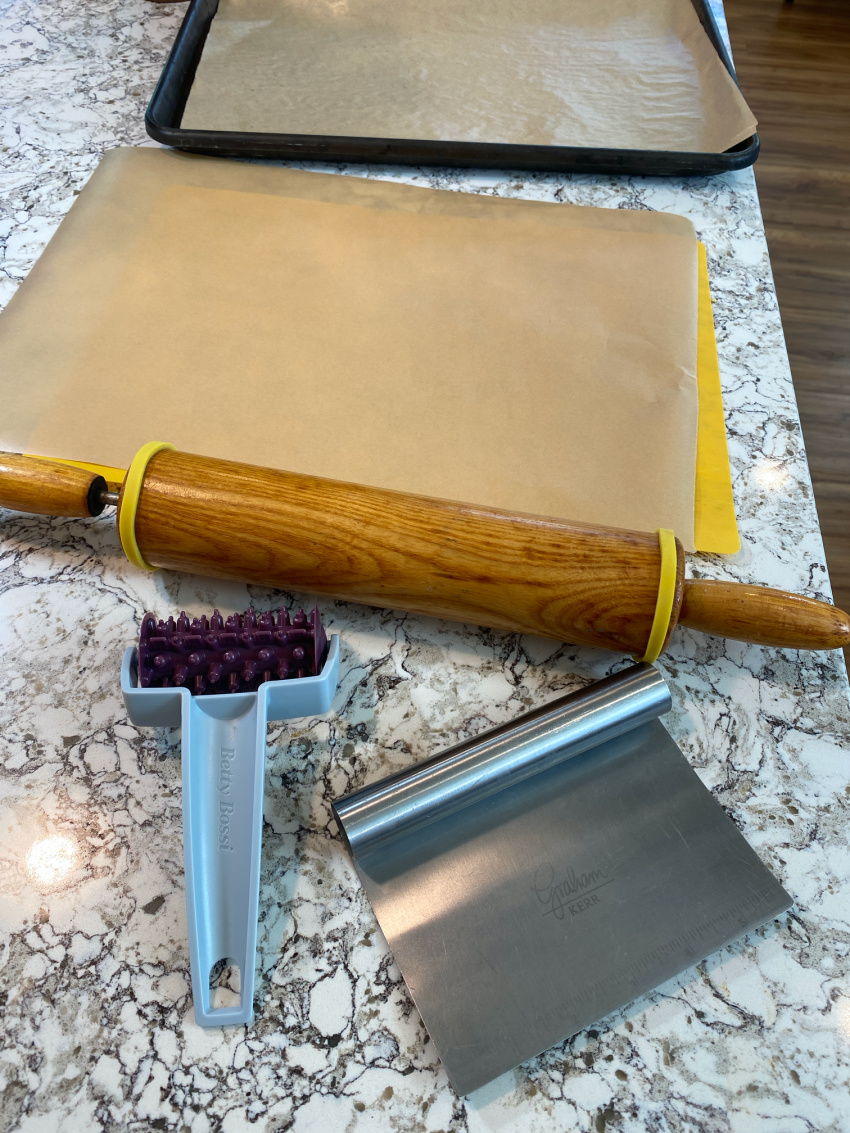
I used the tools you see below to make it easy, but you definitely don’t need the cracker roller…it just makes them more uniform in size and they look a little nicer. You can use a knife instead of the scraper/cutter. The little bands on the rolling pin make it easy to get the dough rolled to an even 1/8th inch, but you can eyeball that instead. In addition to these tools, I also use a silicone spatula…the kind used to mix and scrape.

Seedy Flax Crackers~Oil-Free & Gluten-Free

Let’s get started. Mix the flax meal with the boiling water and let it sit for 5 minutes. If you are going to add any nuts, seeds, or seasoning, get them out. Chop up the nuts or seeds.

The flax mixture will be thick and can be pressed into a ball (using a rubber spatula) at this point. Use the rubber spatula to knead in any of the optional ingredients. You can also do this with your hands if you wet them, but it is messy.

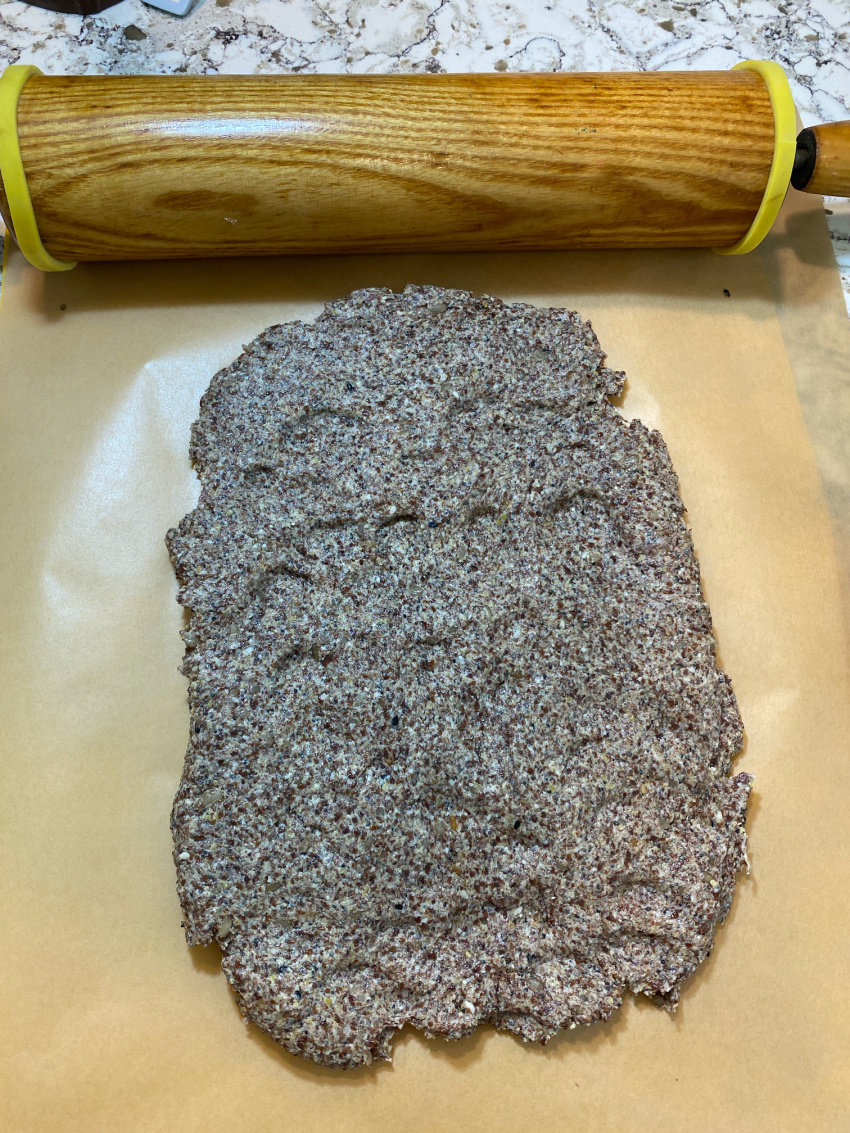
Tip the dough out onto a parchment-lined cutting board (I used a flexible plastic cutting board)  and press it with the back of the spatula or your wet hands. Form a rectangle narrow enough to miss the spacers on your rolling pin.

Seedy Flax Crackers~Oil-Free & Gluten-Free

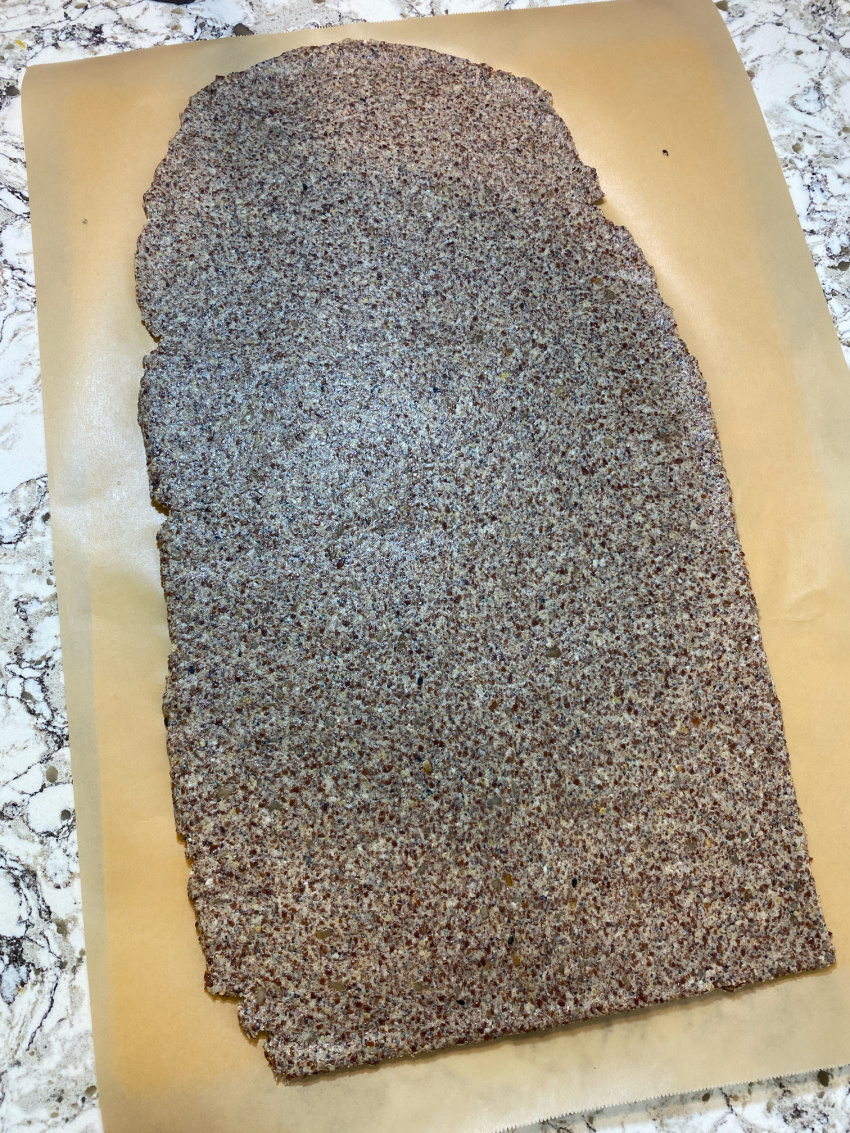
Top the dough with another sheet of parchment and roll the dough out until it is 1/8th inch thick

Seedy Flax Crackers~Oil-Free & Gluten-Free

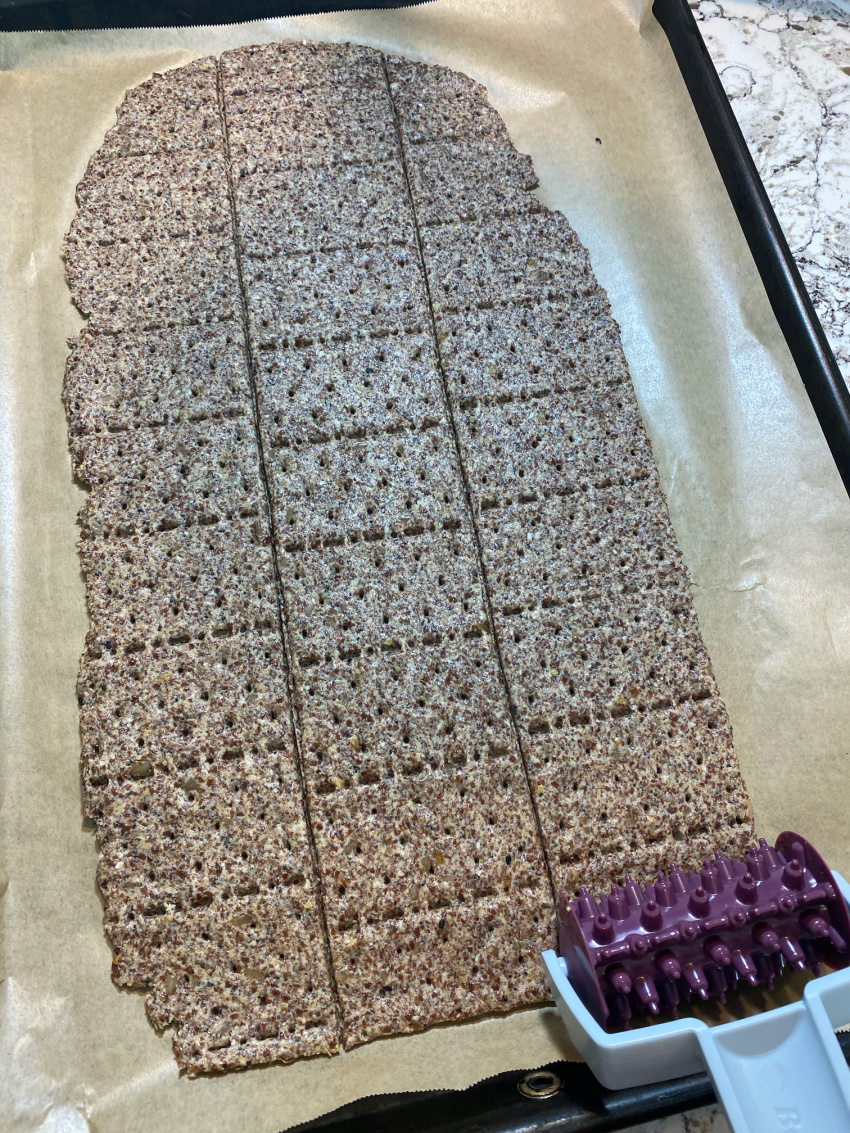
Carefully peel the top parchment off. Using the cutting board, slide the parchment and dough onto a baking sheet. If using a cracker rolling tool, roll it to create perforations.  If not using the roller, you can bake it as is and break it into pieces when it’s done. Or you can use a knife and score it before baking.

Seedy Flax Crackers~Oil-Free & Gluten-Free

Bake at 350 degrees for about 20 minutes and remove from the oven and carefully flip it over. I used a piece of parchment and the flexible cutting board on top and then flipped it. Be sure that only parchment is on the baking sheet and not the plastic cutting board! I may or may not have put my PLASTIC cutting board in the oven for a few minutes before I realized what I’d done!🤭

Bake for an additional 20-25 minutes, watching for browning. If any edges start to get too brown, break those crackers off and take them out, leaving the rest to finish.

They will crisp up more when cooled, so it’s good to pull one out towards the end and let it cool and test it for crispness.

Cool on the baking sheet or move to a cooling rack. When completely cool, store in an airtight container. They’ll be fine at room temperature for about a week or store for much longer in the refrigerator.

Serve with your favorite hummus or with your favorite plant-based cheese. The delicious cheese in the first photo is made using this recipe from Bradi at the Vegan8.

Seedy Flax Crackers~Oil-Free & Gluten-Free

Seedy Flax Crackers~Oil-Free & Gluten-Free
Print
Seedy Flax Crackers~Oil-Free & Gluten-Free

These Seedy Flax Crackers~Oil-Free & Gluten-Free have just two basic ingredients and you can add in any nuts, seeds, or seasonings that you like.

Course: Appetizer
Cuisine: gluten-free, oil-free, wfpbno
Keyword: Seedy Flax Crackers~Oil-Free & Gluten-Free
Author: Trish Hall
Ingredients
  • 1 cup flax meal
  • 3/4 cup boiling water
  • 2-4 Tbsp seeds of choice, chopped OPTIONAL
  • 1/4 cup nuts of choice, finely chopped OPTIONAL
  • 1-2 tsp seasoning of choice (See Notes) OPTIONAL
Instructions
  1. Oven 350 degrees

  2. In a small mixing bowl, add flax. Add boiling water and stir well. Set aside for 5 minutes.

  3. If using optional ingredients, chop the nuts and/or seeds.

  4. Add any optional ingredients to the flax dough. Push them in with a flexible spatula or wet hands. I used the silicone spatula/scraper and pushed and "kneaded" it just like you would knead bread dough.

  5. Once everything is well incorporated, tip the dough onto a parchment-lined flexible cutting board or onto your counter. Press into a rectangle that is narrower than your rolling pin.

  6. Add a sheet of parchment on top and roll the dough out to 1/8th inch thick. See the blog post for pictures of the guides I use on my rolling pin. Peel off the top parchment.

  7. Carefully slide the parchment/dough onto a baking sheet using the flexible cutting board or just by lifting the parchment carefully.

  8. Score the dough with a cracker roller or knife. (Or you can just bake it as it is and break it up after baking).

  9. Bake for 20-25 minutes until the edges are beginning to lift. Remove from the oven and flip the whole thing over using a piece of parchment on top. ( I used the flexible cutting board to help flip it over...don't accidentally leave it in there!)

Bake again for another 20-25 minutes or until lightly browned. They will crisp up more after cooling, so I take one out towards the end of the time and cool it and check for crispness. You can break them apart as you check them, or wait until they are done and cooled.
  1. Cool on the baking sheet or transfer to a cooling rack.

  2. Enjoy with your favorite hummus, dip, or sliced vegan cheese.

Recipe Notes

For seasonings, I've used the following with good results:

Everything But the Bagel Seasoning (from Trader Joe's)

Garlic powder, onion powder, smoked paprika

Rosemary, thyme, tiny pinch of sage

These Seedy Flax Crackers~Oil-Free & Gluten-Free have just two basic ingredients and you can add in any nuts, seeds, or seasonings that you like.

Filed Under: Appetizers, Recipes Tagged With: flax crackers, Gluten-free, No oil, Oil free, Vegan

Vegan Ceviche

March 25, 2022 by Trish Hall Leave a Comment

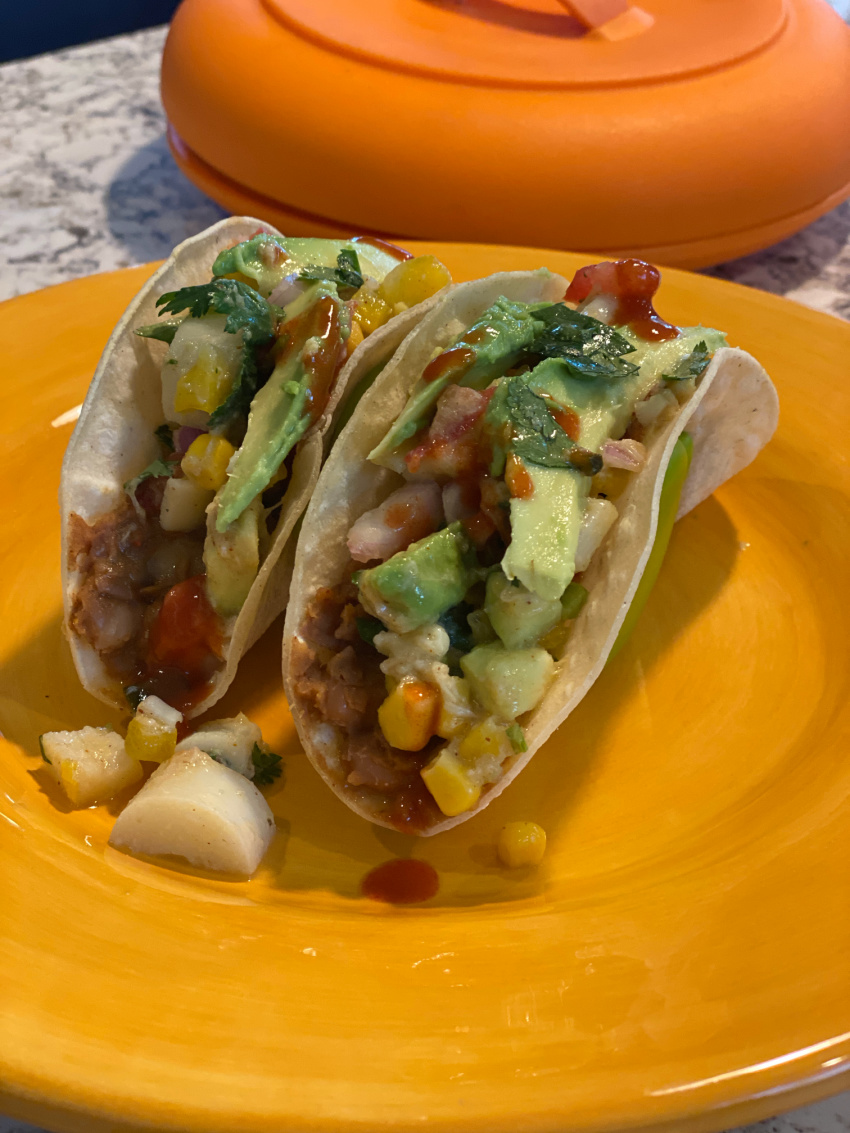
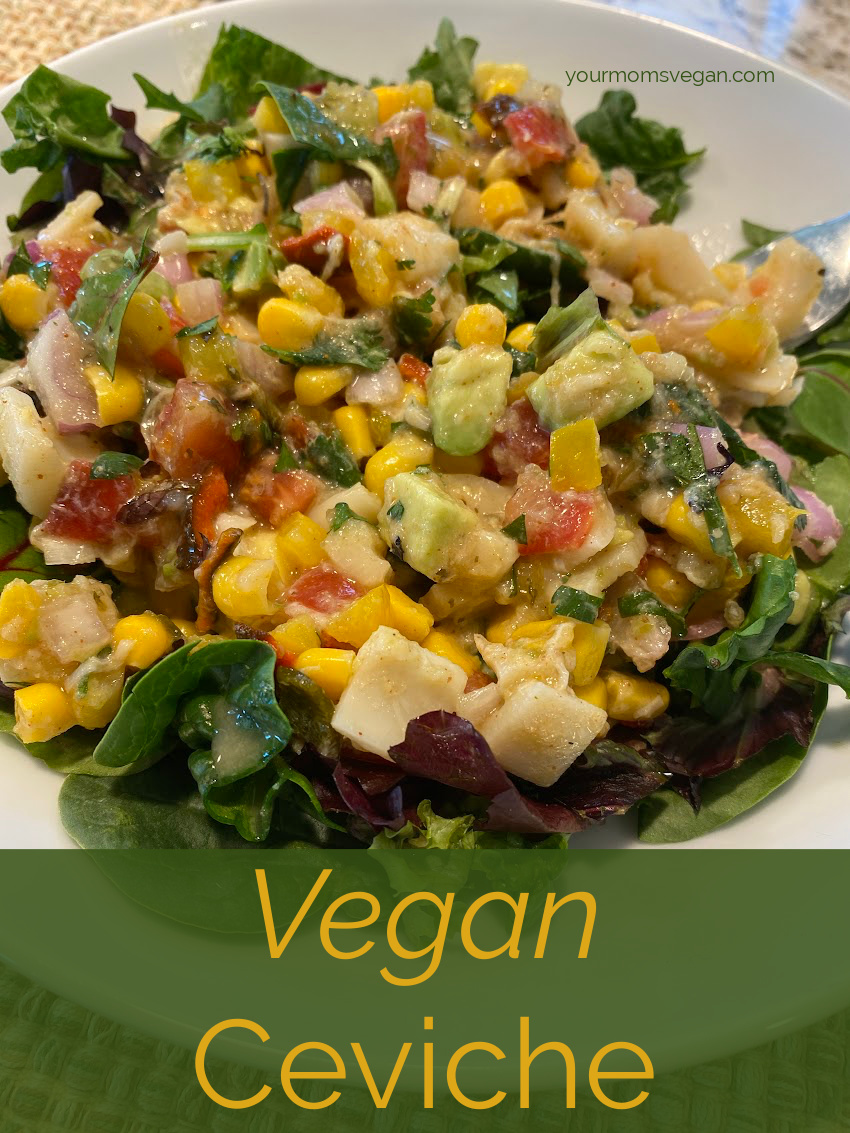
This Vegan Ceviche is full of flavor and a great addition to a potluck. Serve with tortilla chips or as a salad. It’s also great on tacos!

Because I have had many requests, I’m adding this recipe without the usual blog post with detailed pictures and instructions. I’ll update when I have the chance to make this again and take more pictures. Meanwhile, get the recipe in the box below.

Vegan Ceviche

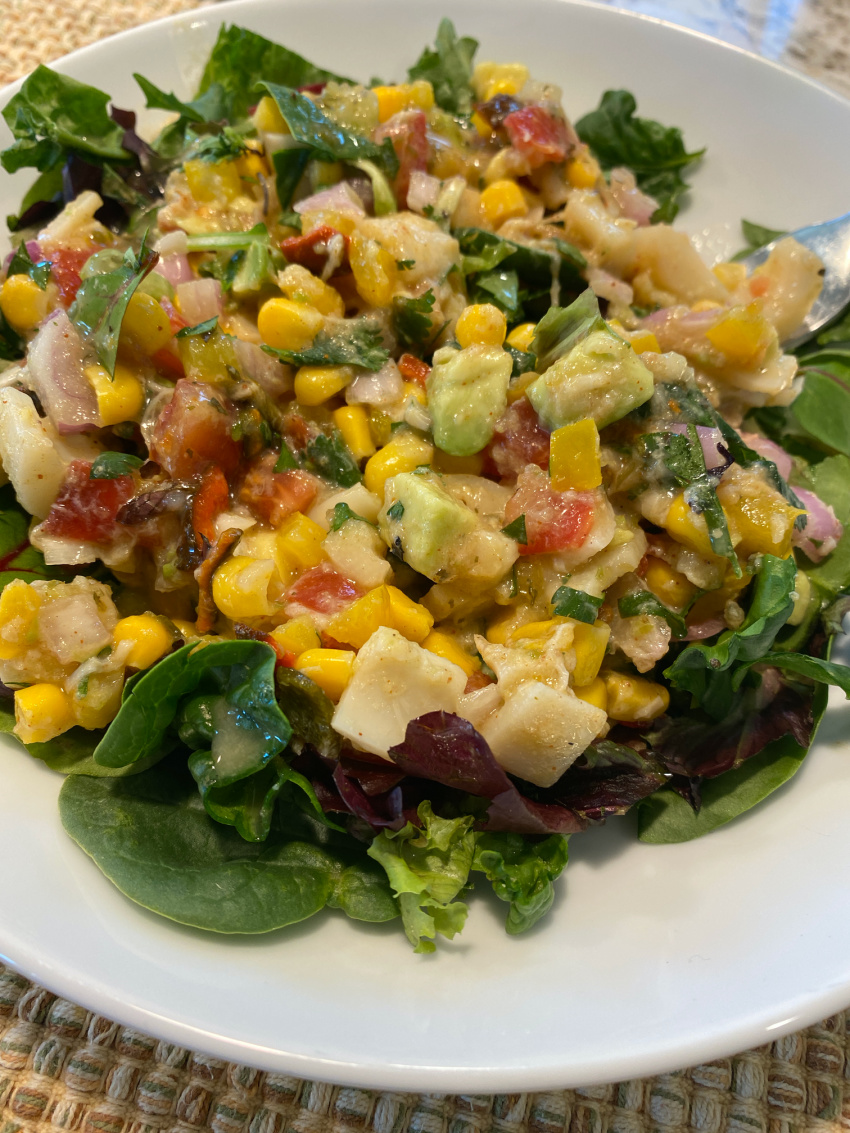
On a bed of mixed baby greens, this makes a delicious salad.


Vegan Ceviche

I think this is my favorite way to eat this ceviche. Warm, soft corn tortillas with homemade refried beans and filled with ceviche.

Get my refried beans recipe here.

Print
Vegan Ceviche

This Vegan Ceviche is full of flavor and a great addition to a potluck. Serve with tortilla chips or as a salad. It's also great on tacos!

Course: Main Course, party, Salad, Side Dish
Cuisine: Mexican
Keyword: faux fish, gluten-free, Hearts of Palm, no oil, oil-free, Vegan Ceviche
Ingredients
  • 1/4 cup lime juice Fresh squeezed is best
  • 1/4 cup lemon juice Fresh squeezed is best
  • 1-2 tsp minced garlic I used 3 cloves
  • 1/4 cup chile of choice, chopped fine I used a roasted poblano
  • 1/2-1 tsp sugar or sweetener of choice
  • 12-14 oz can hearts of palm, chopped (1/2") or shredded
  • 1/2 cup corn I used frozen, but canned or fresh is good too.
  • 1/3-1/2 cup chopped red onion or shallot
  • 1/2 cup chopped bell pepper I used a yellow one
  • 2 medium avocados, ripe but still firm, chopped
  • 1/2 cup cilantro, chopped
Instructions
  1. Add lemon and lime juice to a large bowl. Add garlic, chile, and sugar. Stir well.

  2. Add the hearts of palm and stir it well.

  3. Add all the rest of the ingredients and stir well. Let it sit for about 15 minutes, stirring occasionally until the onions soften a little bit.

  4. I like to let this sit for a couple of hours or even overnight, but it is not necessary.

  5. Serve with tortilla chips or in a soft, warm corn tortilla. Or on a bed of baby greens.

This Vegan Ceviche is full of flavor and a great addition to a potluck. Serve with tortilla chips or as a salad. It's also great on tacos!

Filed Under: Recipes

Vegan Sausage and Apple Stuffed Butternut Squash

December 7, 2021 by Trish Hall 2 Comments

This post is under construction but published for the people who have asked for the recipe a.s.a.p. 

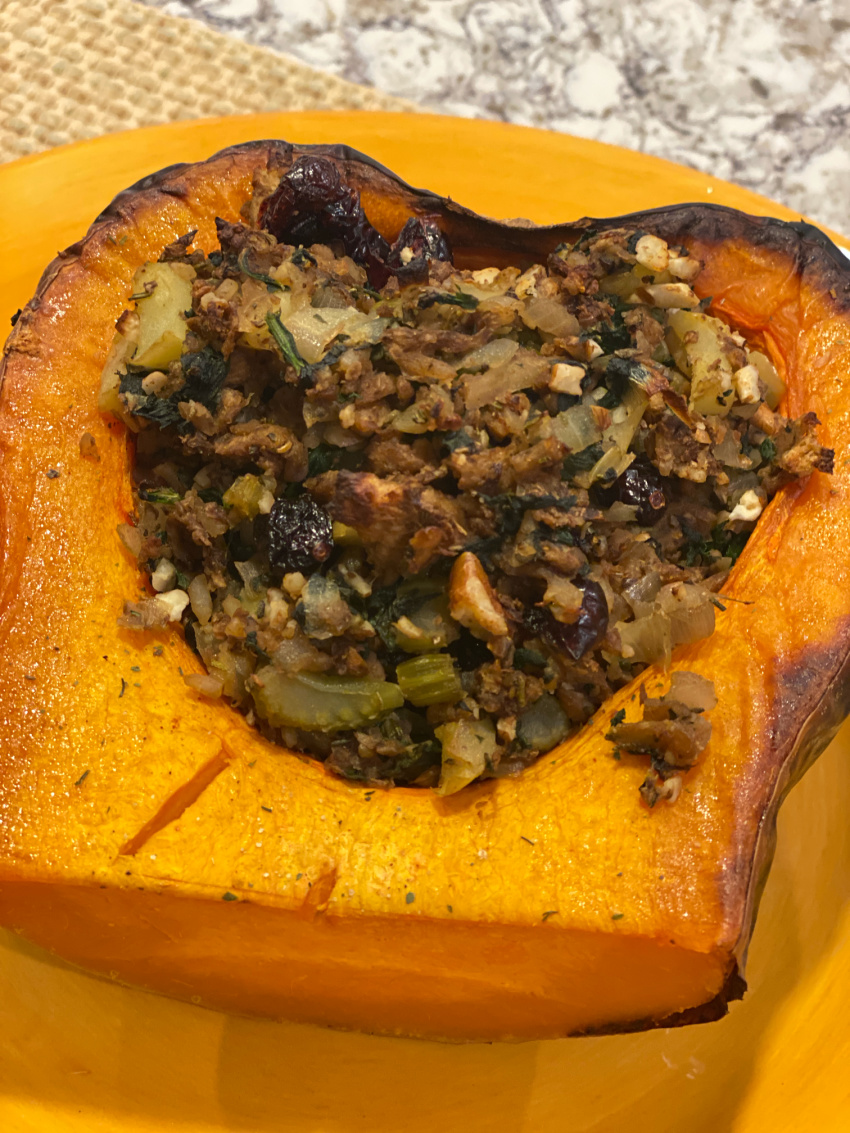
This Vegan Sausage and Apple Stuffed Butternut Squash is full of fall flavors. The filling can be made ahead and frozen so you can put this meal together on busy days.

5 from 1 vote
Print
Vegan Sausage and Apple Stuffed Butternut Squash
Ingredients
  • 2 whole butternut squash (2-2.5.lb each) You can use one big one, like pictured, just cut off the top and save that part for another recipe.
  • 1-2 cups onions, diced
  • 1-1.5 cups celery, diced
  • 3-4 cloves garlic, minced
  • 1/2-1 Tbsp fresh chopped sage
  • 1/2-1 Tbsp fresh chopped rosemary
  • 1-2 small apples, chopped
  • 1/4 cup broth, wine or water- to deglaze the pan if needed
  • 3 cups spinach, chopped
  • 2-3 cups crumbled vegan sausage Link to my oil-free, gluten-free sausage in Notes.
  • 1/4 cup dried cranberries
  • 1/4 cup pecans, chopped
  • salt, pepper, or saltless seasoning of choice Optional
Instructions
  1. Prep and roast the squash. Preheat the oven to 425 F. Add parchment to a baking sheet.

    Slice the squash lengthwise, scoop out the seeds and discard. Season it with salt, pepper or seasoning of choice.

    Place the squash cut side down on the baking sheet and cook it for 40-45 minutes until a sharp knife can be easily inserted into the center of the squash.

    Remove and let cool.

  2. While squash is cooking, add onions to a dry skillet on low heat and sauté, using broth, wine or water as necessary to deglaze the pan.

  3. Add celery and garlic. Cook for a few minutes and then add in the fresh herbs and apples. Deglaze the pan with broth, wine, or water, as needed.

  4. Cover and simmer, stirring occasionally until the celery and apples are softened.

  5. Add the spinach and stir and cook until it begins to wilt. Add the sausage and stir to mix. Remove the pan from the heat and add the cranberries and pecans and mix it all together.

  6. If using two small butternuts, scoop out the flesh of the squash, leaving a 3/4-1" border around the edges and about a 2" amount of squash at the bottom.

    If using one large squash, like pictured, cut off the top (neck) of the squash, scoop out the cavity leaving about 2" of squash all around.

  7. Divide the filling and fill each cavity.

  8. Lower the oven temperature to 375 F and place the squash back into the oven for about 10-15 minutes.

Recipe Notes
  • Use the remaining squash for soups, sauces or just eat it as is. 
  • You could use this filling recipe to stuff different squash. Acorn, Kabocha, or even Spaghetti squash would work well. 
  • Next time I make it, I am going to peel, cube, and roast the squash and layer it into a casserole dish, and top with the filling mix. 
  • I think it would be lovely served with gravy. 
  • The filling can be made ahead. Store in the fridge for 2-3 days or freeze in an airtight container. Reheat in the microwave or in the oven on a baking sheet lined with parchment paper. 
  • Here's the link to my sausage recipe.

Filed Under: Recipes

Vegan Oil-free Cauliflower Sweet Potato Curry

November 7, 2021 by Trish Hall 2 Comments

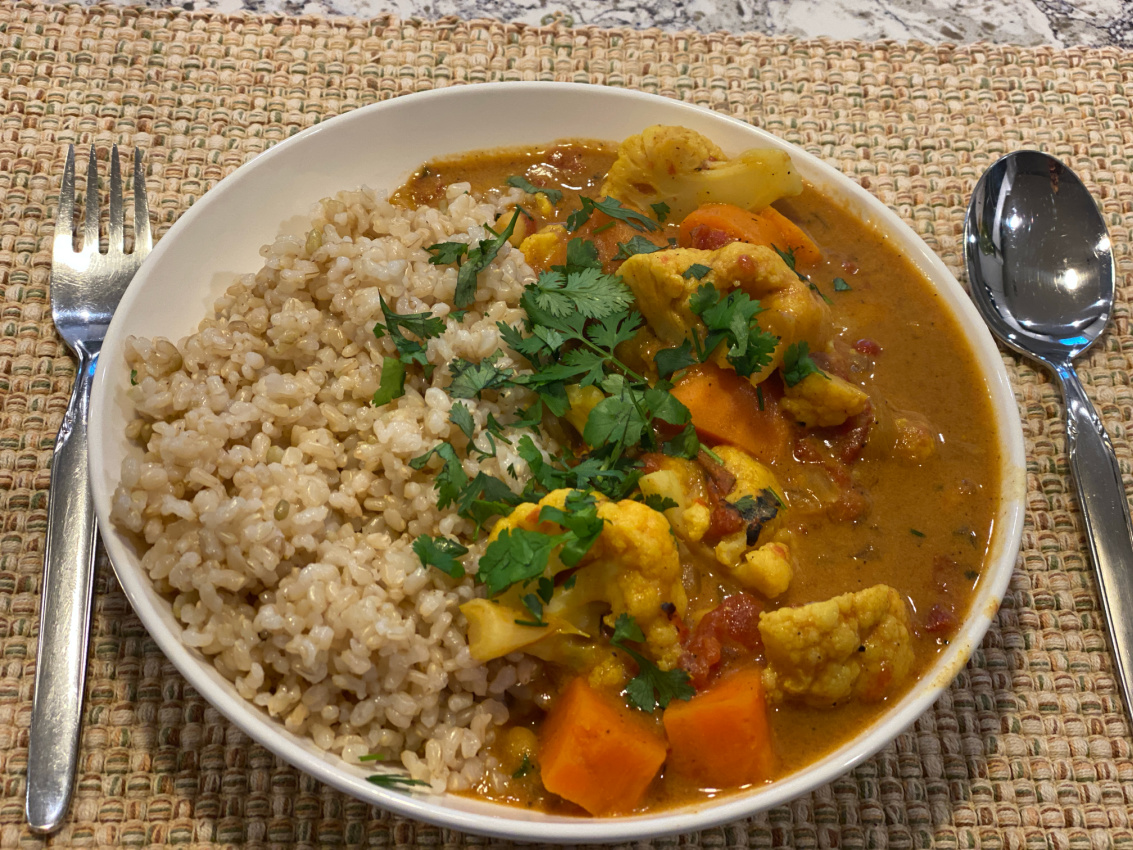
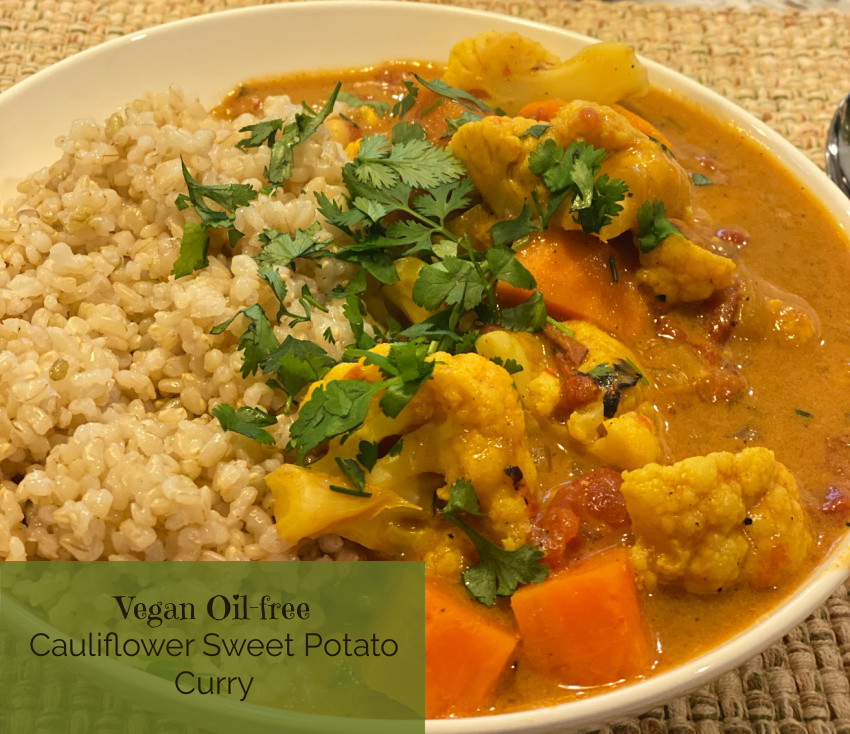
Full of the flavor of warm spices this Vegan Oil-free Cauliflower Sweet Potato Curry is perfect for a cool fall or winter evening. Vegan Oil-free Cauliflower Sweet Potato Curry

This is comfort food to me!

You can use pre-cut veggies to make it faster. Chopping veggies isn’t too time-consuming for me, so I like to use fresh, whole cauliflower and sweet potatoes.

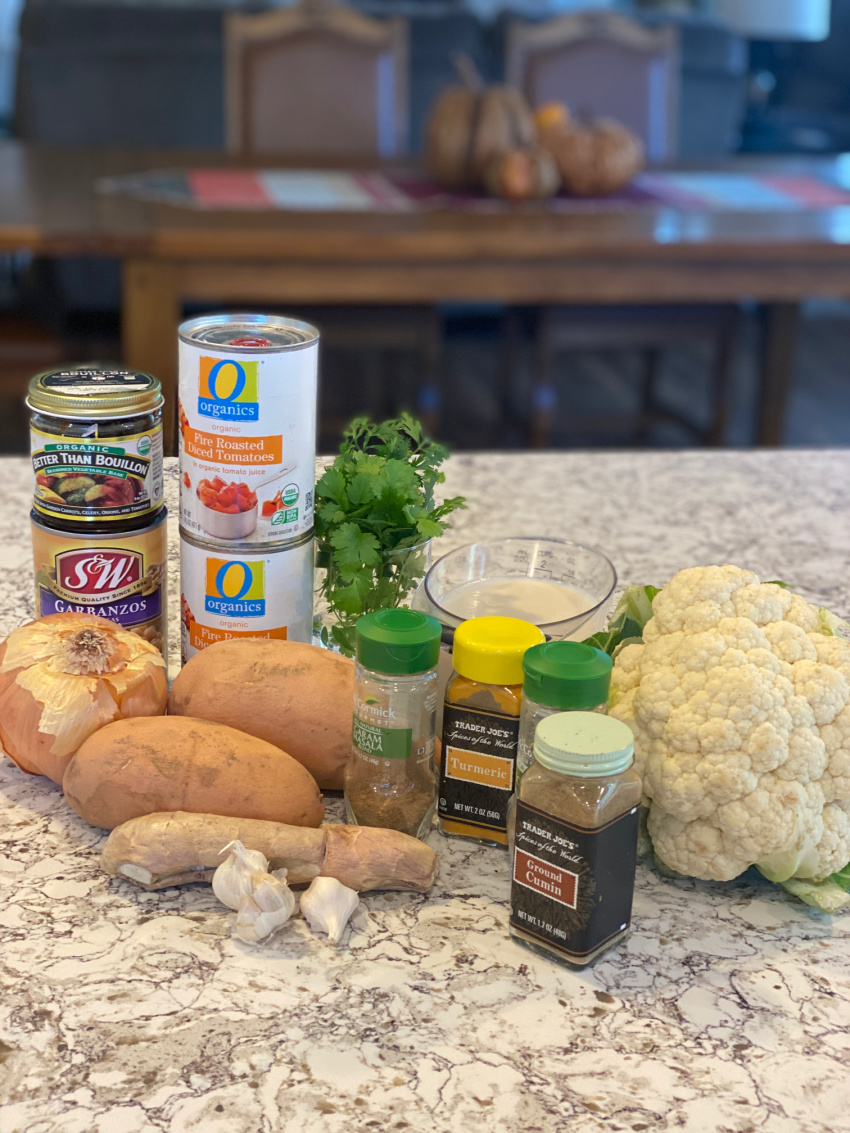
Gather your ingredients!

Vegan Oil-free Cauliflower Sweet Potato Curry

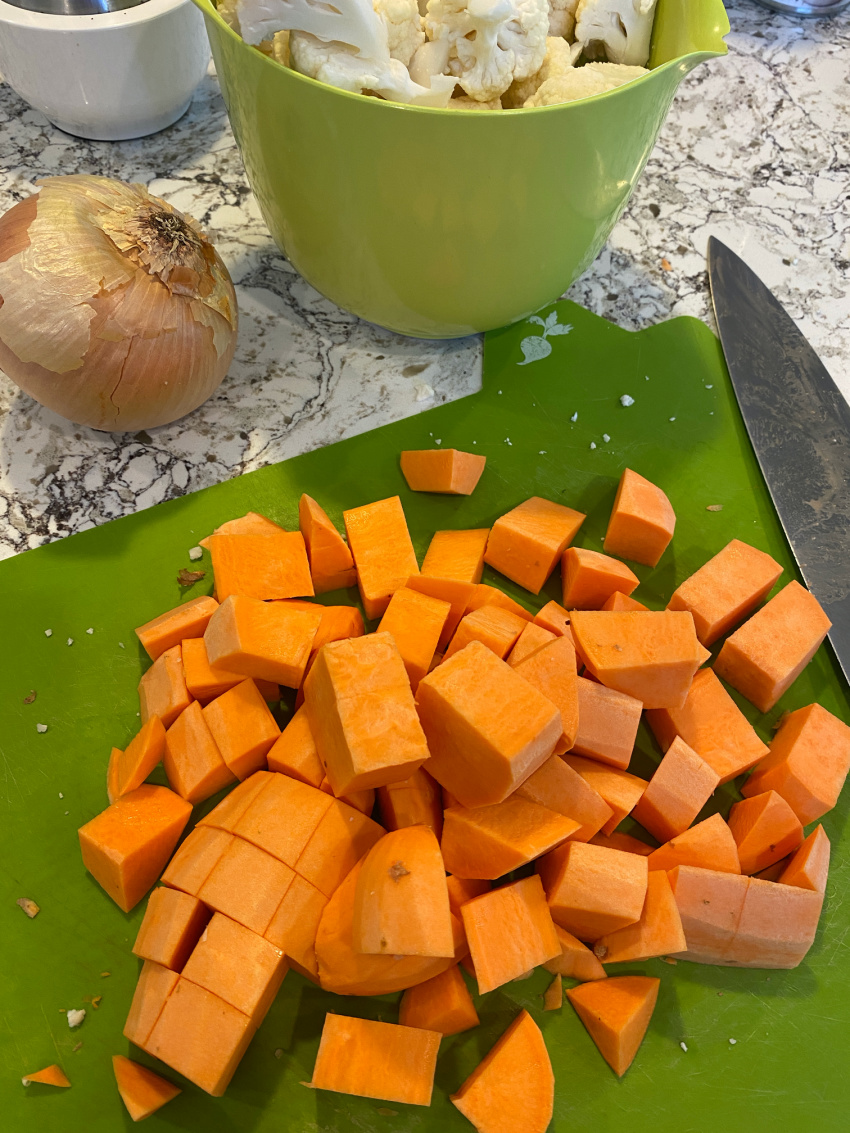
Chop the sweet potatoes into bite-sized pieces. I cut them into about 1″ cubes.

Vegan Oil-free Cauliflower Sweet Potato Curry


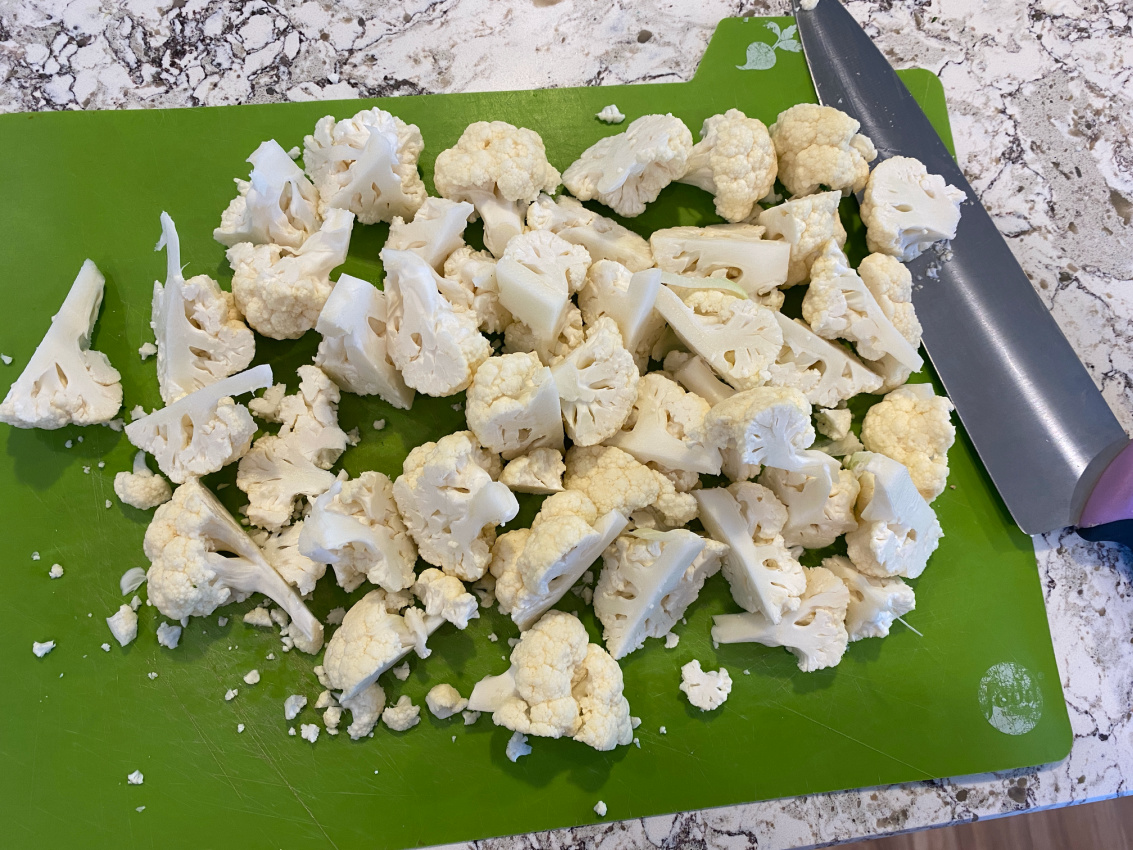
Cut the cauliflower into bite-sized florets.

Vegan Oil-free Cauliflower Sweet Potato Curry

Dice the onions into small pieces. I use this chopper to get it done fast. If you use that link to buy the chopper, I will get a few cents, at no additional cost to you.

If you are using fresh ginger, grate or mince it to a fine paste.

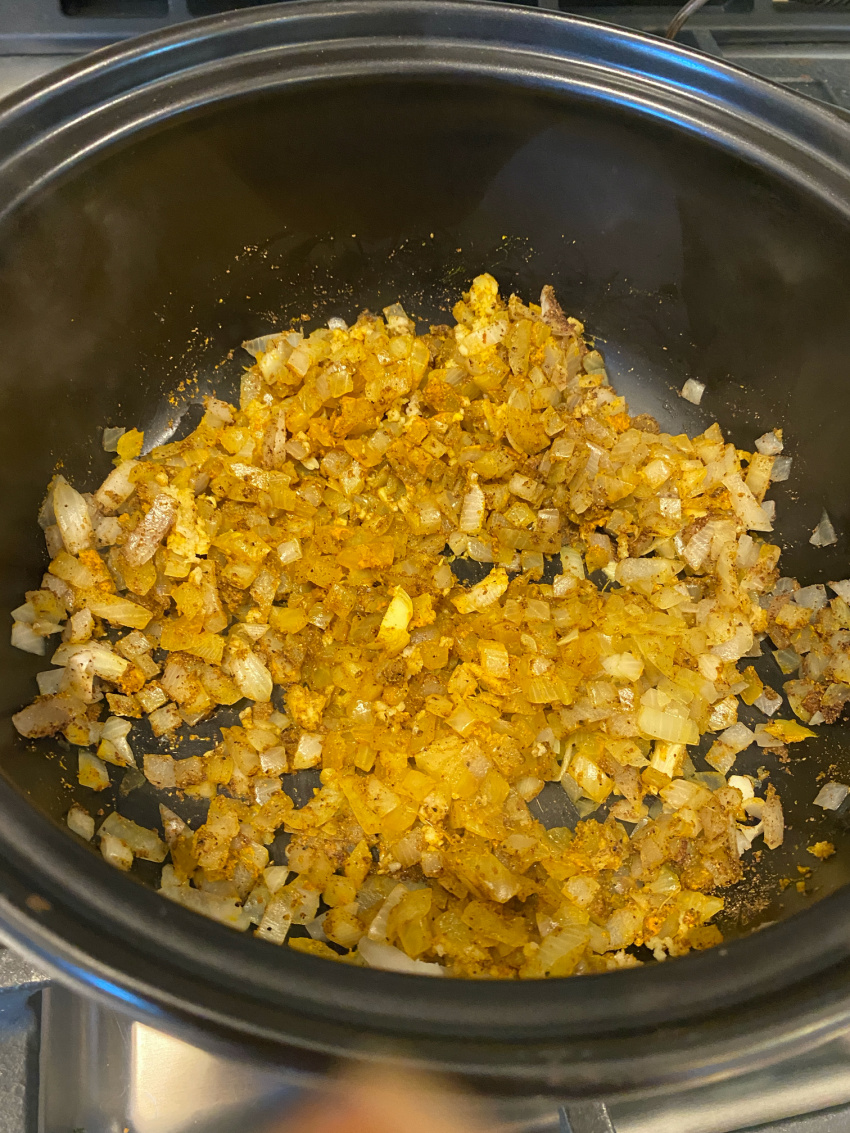
Sauté the onions in a large pot. Add a splash of water or broth if they begin to stick and scrape them up. Continue to cook them low and slow until they soften. Add the garlic and ginger. Cook for about 5 minutes and then add the spices and cook for another minute or so.

Vegan Oil-free Cauliflower Sweet Potato Curry

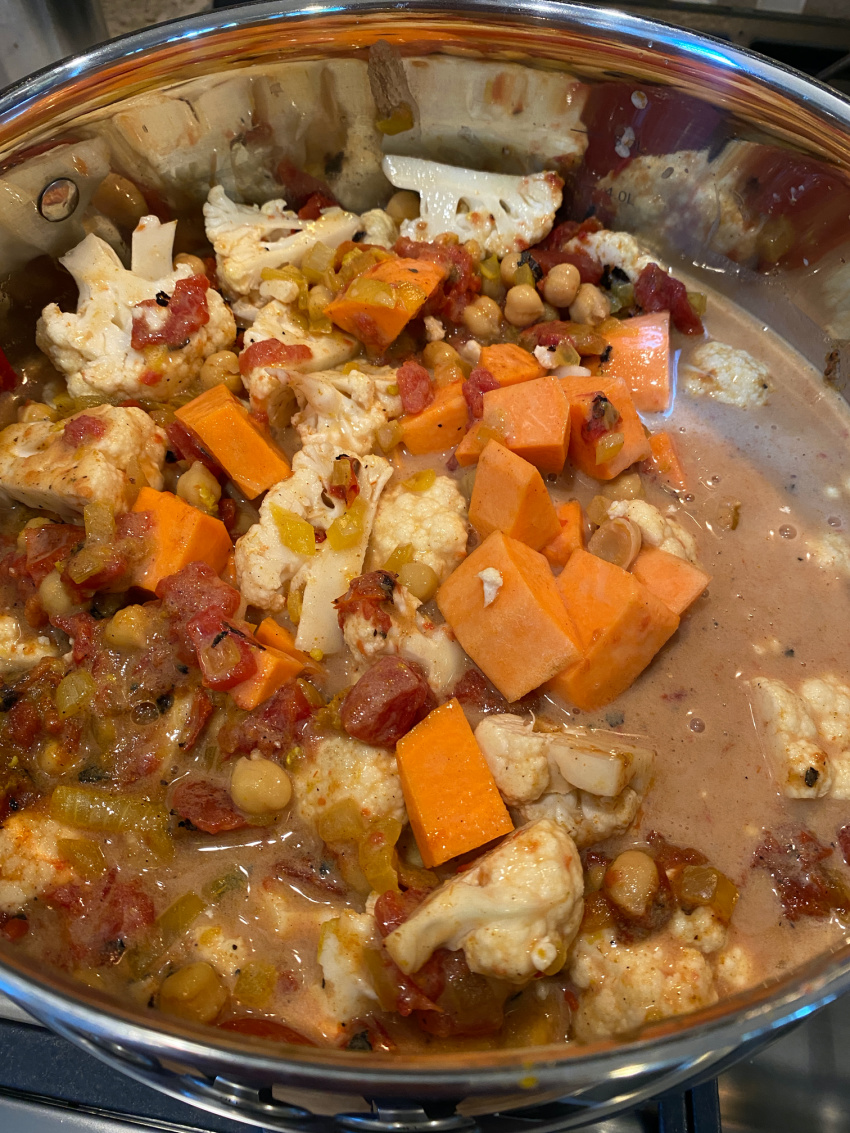
Add the chickpeas, tomatoes, sweet potato, cauliflower, and plant milk and broth (if using). I like to add the broth because I like there to be plenty of “gravy” to pour over my rice. If you are planning to this eat on roti or in a similar way, you might like it to be a thicker stew and you would leave the broth out or use much less.

Vegan Oil-free Cauliflower Sweet Potato Curry

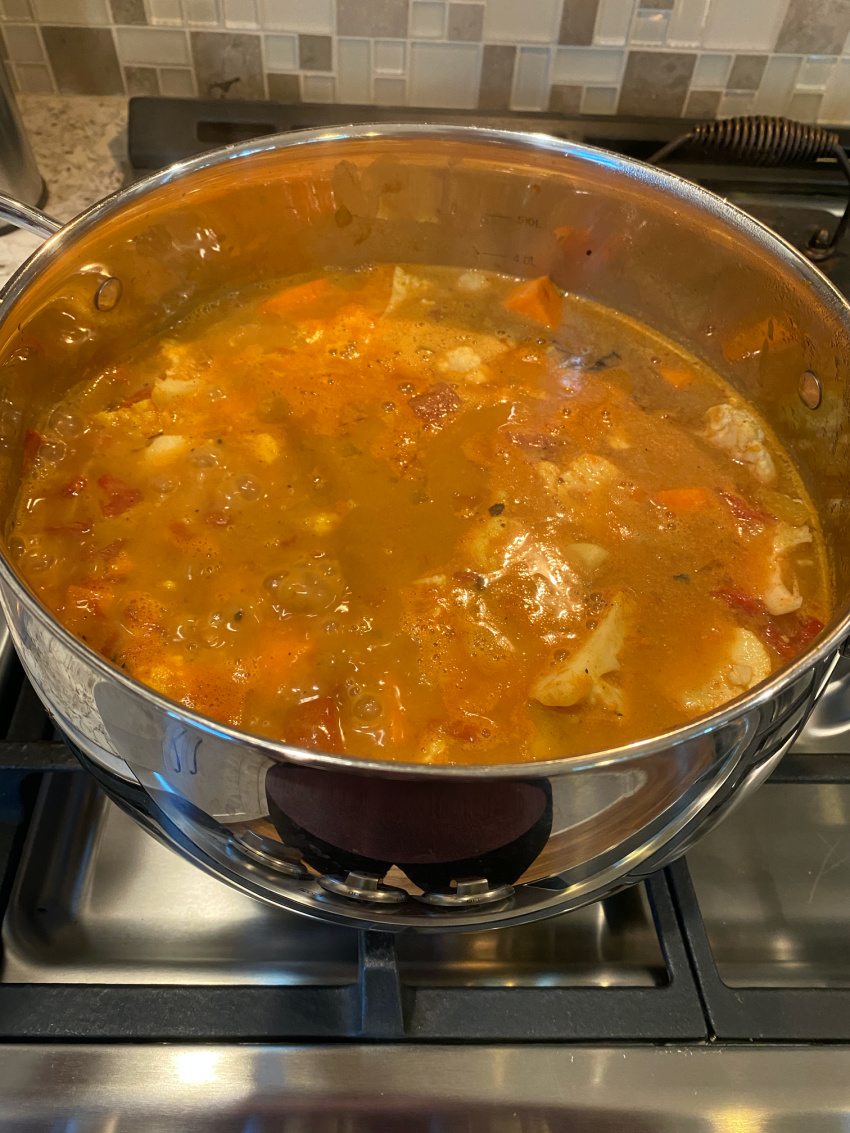
Bring to a boil, then lower the heat to medium, cover, and simmer for 20-30 minutes. I usually leave the lid cocked to avoid boiling over, depending on the pot I’m using.

Stir occasionally and check sweet potatoes and cauliflower by poking with a fork. You want them tender, but not mushy.

Vegan Oil-free Cauliflower Sweet Potato Curry

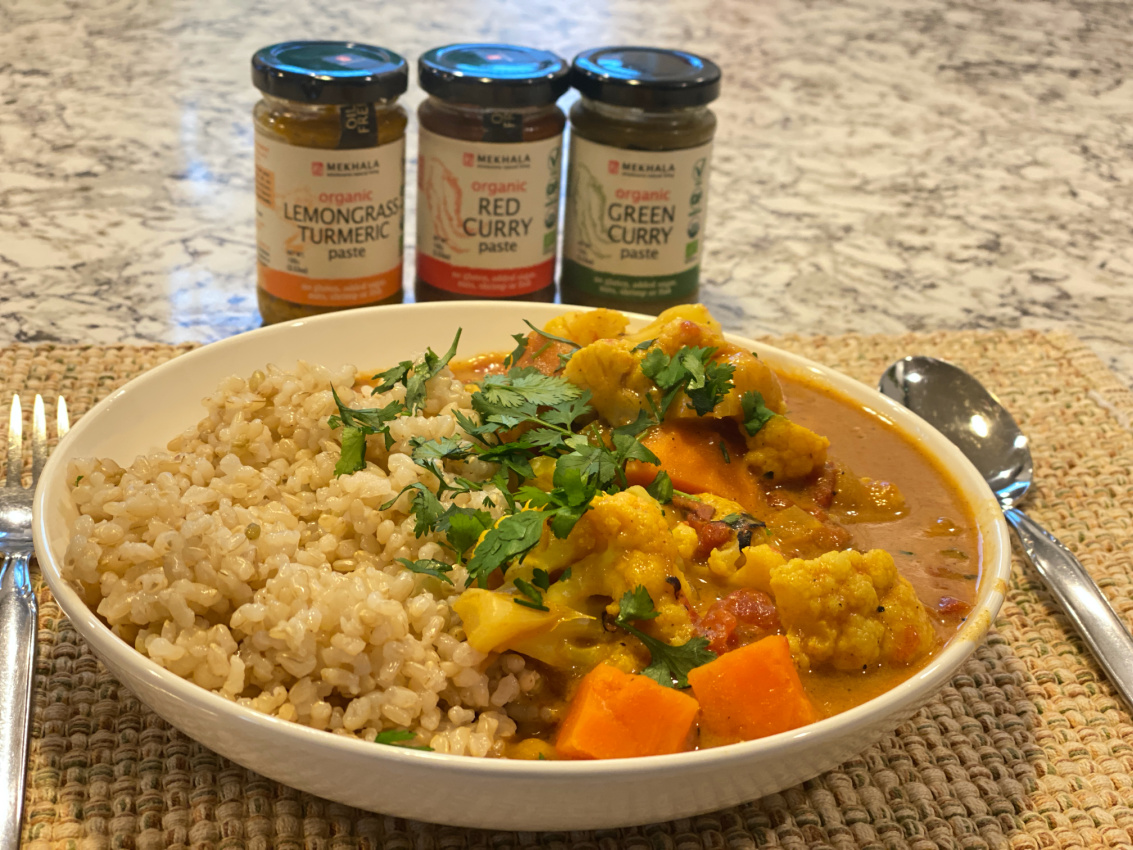
Add salt and pepper, if using. You can add the optional curry pastes now or add them to your individual servings to suit each person’s tastes. I add both the red and green curry paste for a nice bit of HEAT, and my mom adds the turmeric paste for additional flavor with no heat.

Serve over cooked rice or with roti for dipping. Garnish with cilantro, if desired.

Pictured below are the pastes from Mekhala. All oil-free, gluten-free and delicious!

5 from 1 vote
Print
Vegan Oil-free Cauliflower Sweet Potato Curry

Full of the flavor of warm spices this Vegan Oil-free Cauliflower Sweet Potato Curry is perfect for a cool fall or winter evening.

Course: Main Course
Cuisine: Indian
Keyword: cauliflower, curry, gluten-free, no oil, oil-free, Sweet Potato
Author: Trish Hall
Ingredients
  • 2 cups chopped onion
  • 2-3 cups sweet potato, peeled and chopped into 1" pieces
  • 1 medium head of cauliflower, cut into bite-sized florets
  • 3-4 cloves garlic, minced
  • 1 tbsp fresh ginger, grated or 1/4 teaspoon dried ginger
  • 1 tbsp garam masala can sub curry powder
  • 2 tsp ground coriander
  • 1 tsp ground cumin
  • 1 tsp turmeric
  • 1(15 oz) can chickpeas (about 1.5 cups)
  • 2 (14oz) cans diced tomatoes Don't drain
  • 2 cups plant milk (I used soy) Optional: Add a couple of drops of coconut extract, to mimic the traditional coconut milk.
  • 2 cups veggie broth Optional: I use it because I like lots of "gravy" for serving over rice.
  • 1/4 cup chopped cilantro Optional garnish that I recommend
  • salt and pepper to taste, if desired
  • 3-4 cups cooked rice for serving Optional
  • roti for serving Optional
  • Mekhala curry pastes to taste Optional: See blog post for info
Instructions
  1. Saute the onions until softened. Splash with water or broth if they begin to stick.

  2. Add garlic and ginger and sauté for about 5-10 minutes.

  3. Add spices, stir and cook 1-2 minutes.

  4. Add chickpeas, tomatoes, sweet potatoes, cauliflower, and plant milk. Add broth if you are using it.

  5. Bring to a boil, stir, and then lower heat to medium to simmer, covered for about 20-30 minutes or until cauliflower and sweet potatoes are tender (not mushy). Vent the lid if necessary to keep it from boiling over.

  6. Add salt and pepper if using. Add any optional ingredients like curry pastes.

  7. Serve over cooked rice with a garnish of cilantro if desired. Or serve with roti.

Full of the flavor of warm spices this Vegan Oil-free Cauliflower Sweet Potato Curry is perfect for a cool fall or winter evening.


Filed Under: Main Dish, Potatoes, Quick and Easy, Recipes Tagged With: cauliflower, chickpea, curry, Gluten-free, No oil, Oil free, Vegan

Gluten-Free Chickpea Lettuce Wraps

October 25, 2021 by Trish Hall Leave a Comment


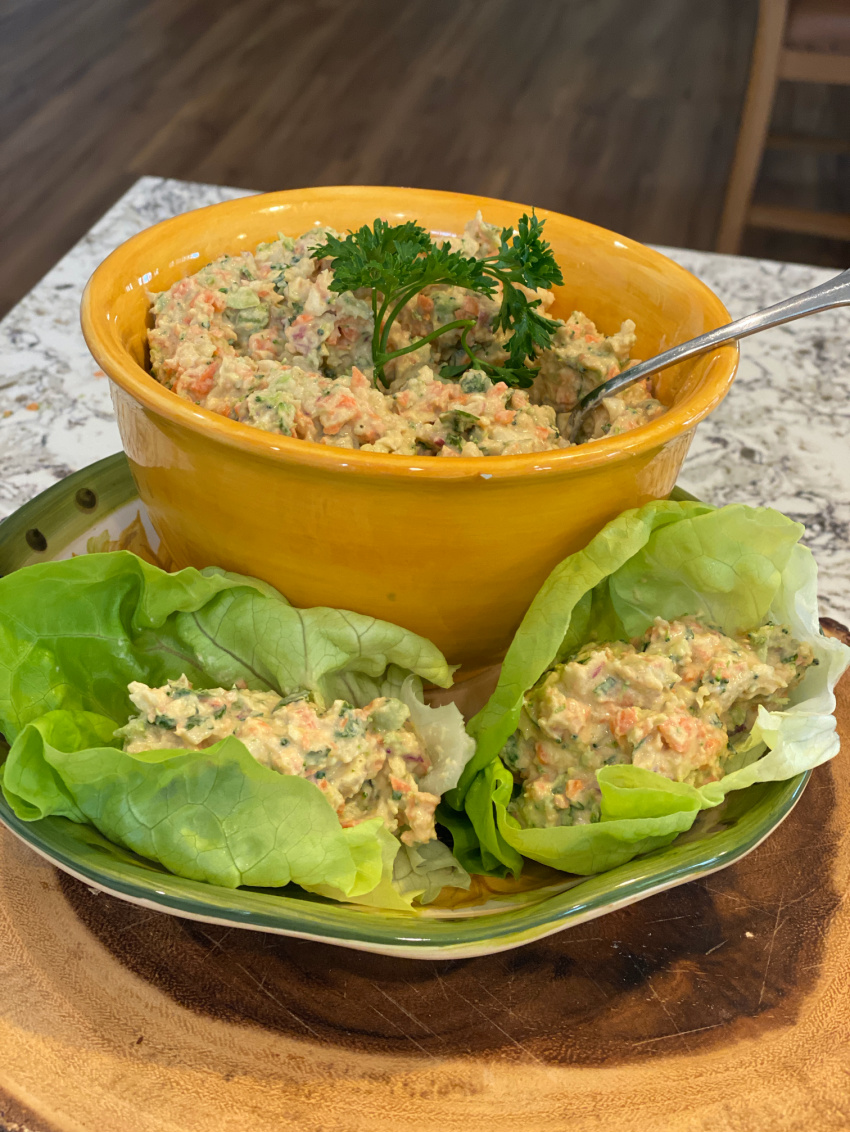
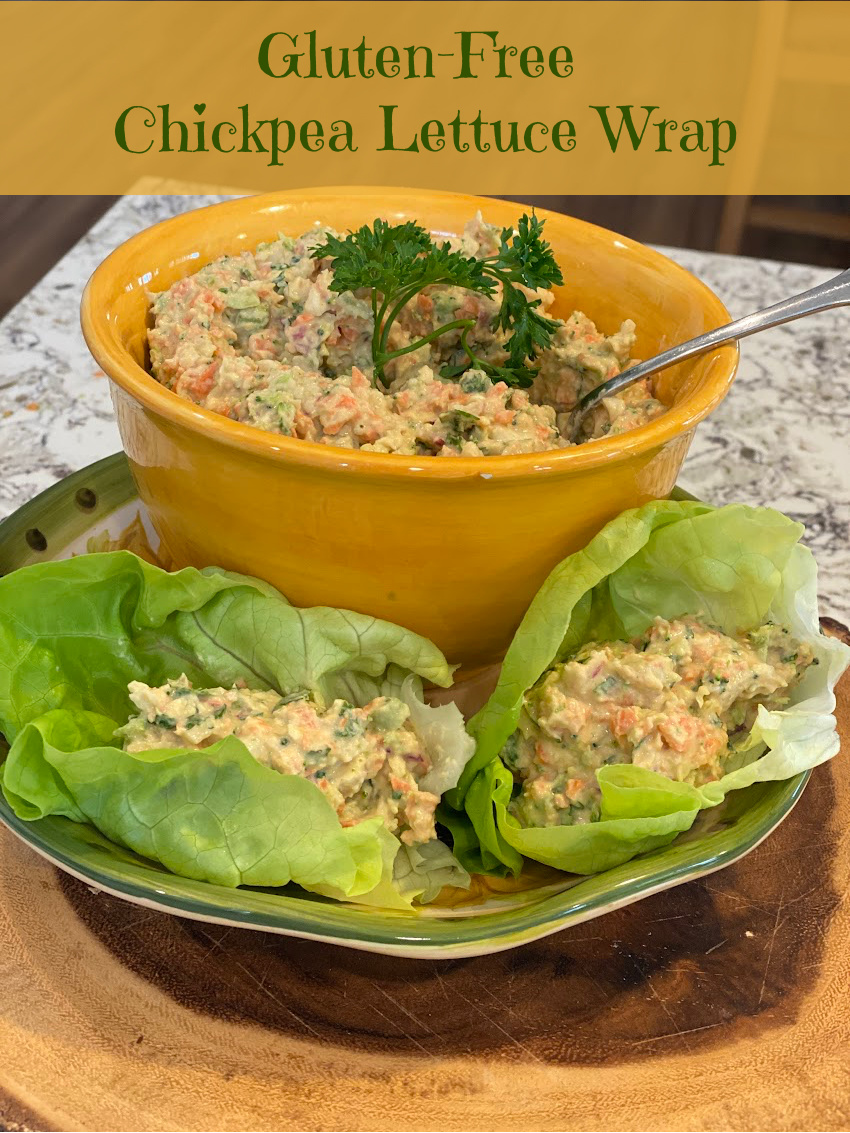
These Gluten-Free Chickpea Lettuce Wraps are packed full of veggies! The filling can be made into a delicious wrap, dip, or sandwich.

Chickpea Veggie Dip or Filling

I created this filling after a busy day that I hadn’t prepared well for. I found myself out running errands during lunchtime and grabbed a wrap from Trader Joe’s. Theirs were wrapped in a lavash which wasn’t the best choice for me because I am sensitive to gluten. It doesn’t make me sick, but I do get bloated and uncomfortable when I eat gluten. So, I peeled off most of the lavash and ate the filling. The filling was good, but I thought it was way too light on the veggies so I put a lot more in mine.

If you don’t need step-by-step instructions and pictures, scroll down to the recipe card below. If you like to see the size and textures of each veggie as I added it, then stick with me here.

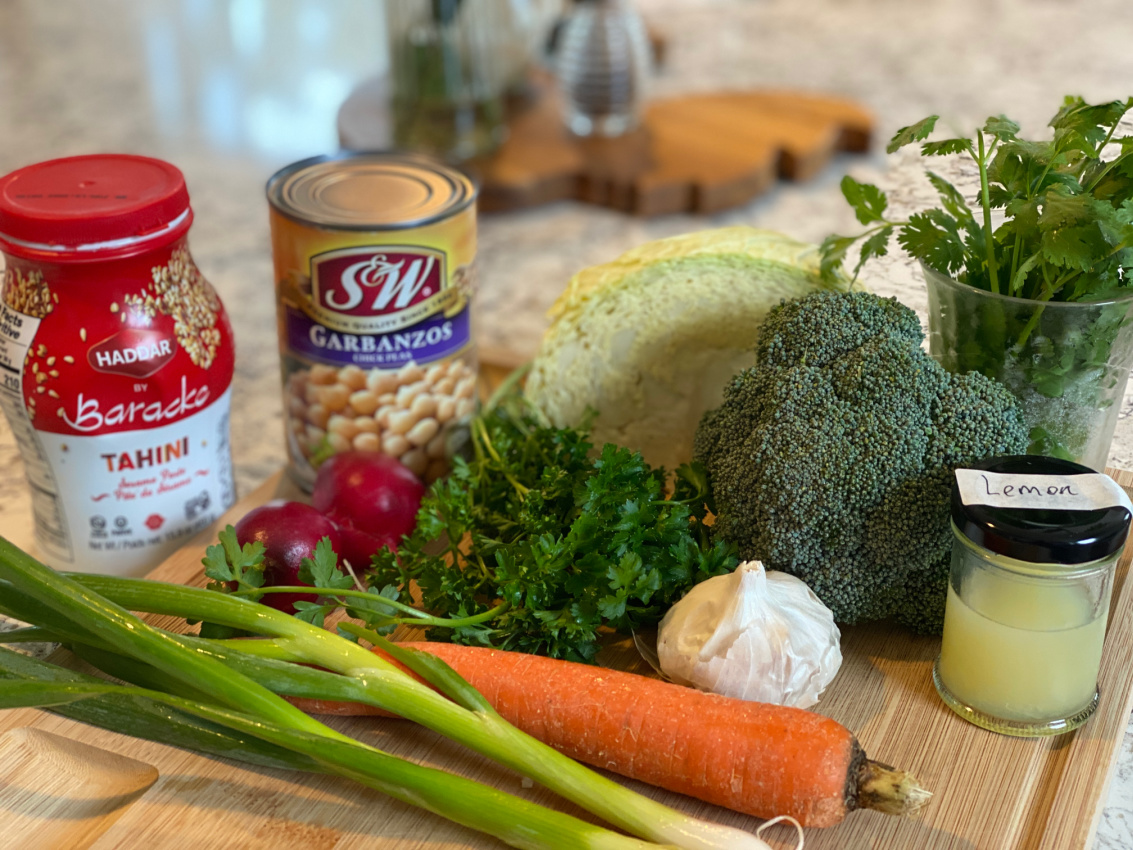
Gather your ingredients.

Gluten Free Chickpea Lettuce Wraps

I used homemade hummus, but you could use store-bought.

To make the hummus I used one can (about 1.5 cups) of cooked chickpeas. I didn’t peel them, but you could if you like ultra-smooth hummus. I blended them with lemon juice, tahini, cumin, and garlic. If you want to make it lower fat, you can replace the tahini with white beans. I used my Cuisinart 13 cup food processor with the small bowl insert. This keeps the ingredients contained near the blade. It got really smooth.

Once you have the hummus made, set it aside.

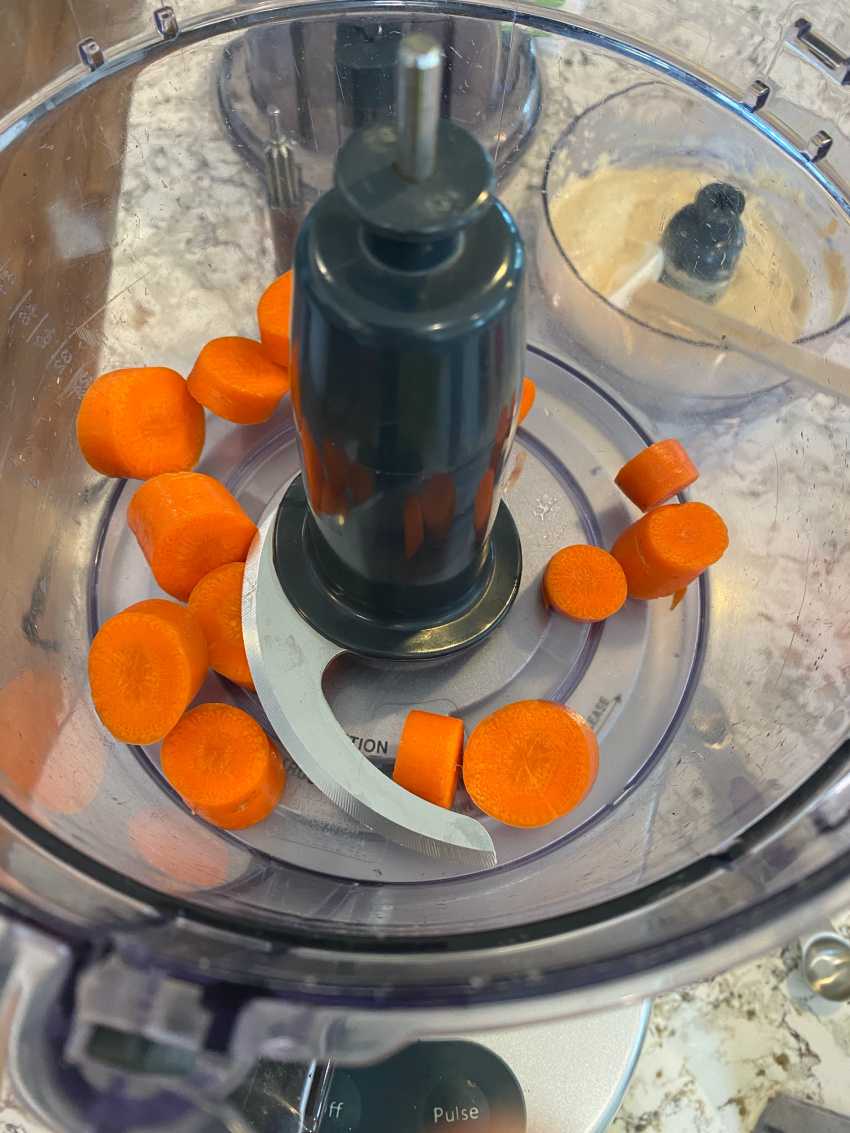
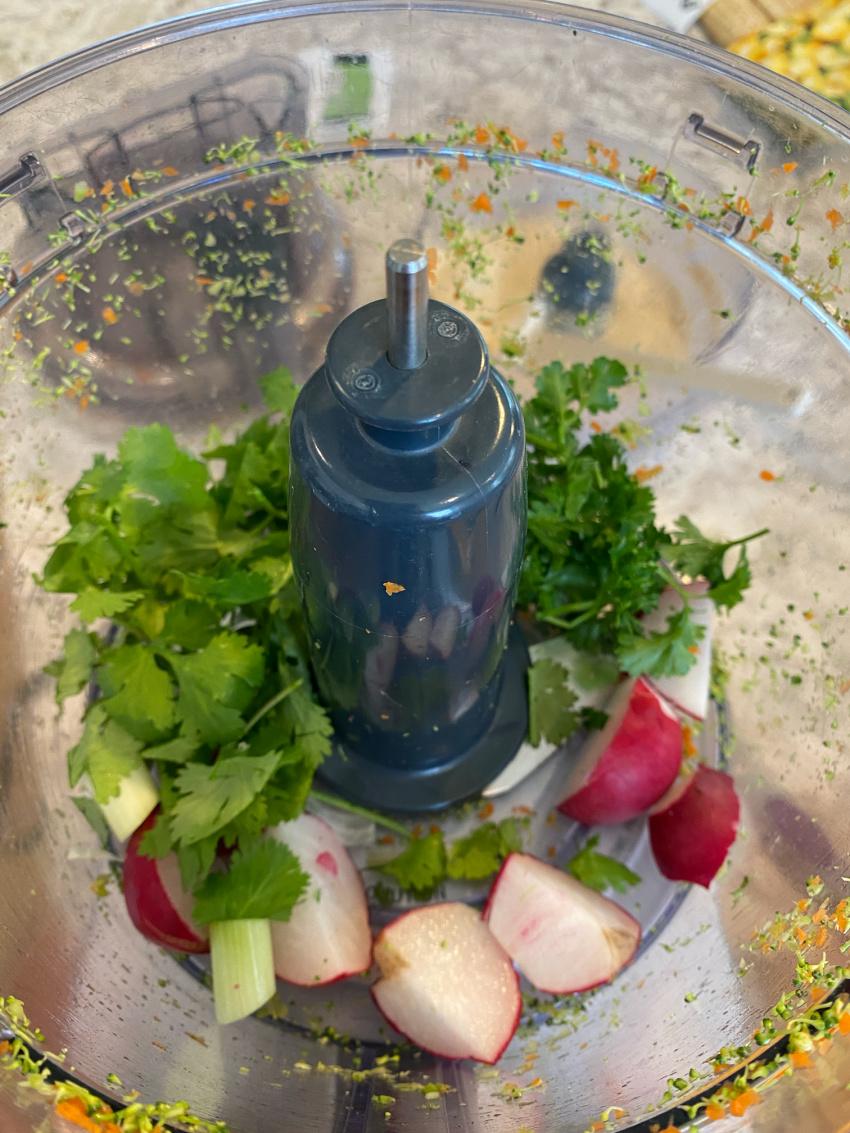
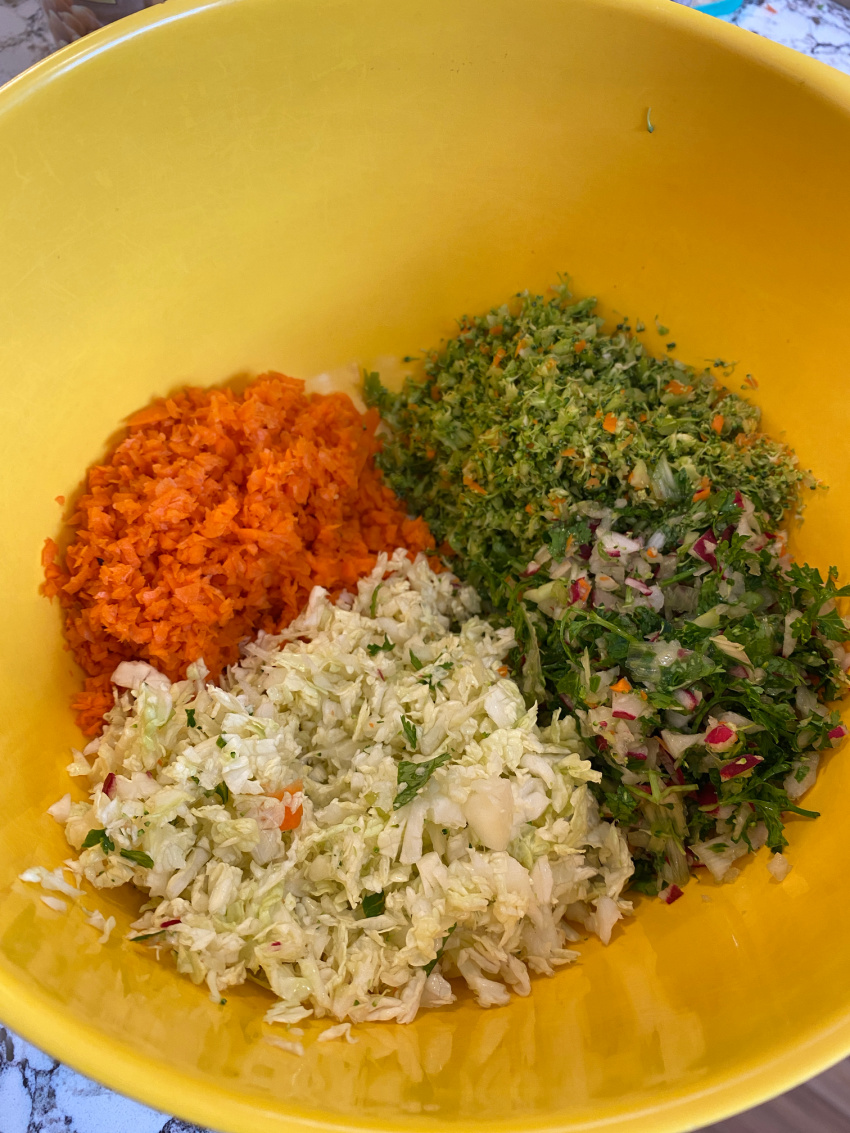
Add the carrot to the food processor and pulse until you have little tiny carrot bits. Add the carrots to a large bowl. Pulse the broccoli to the same size. Do the same with the radish, parsley, cilantro, and green onions.

Gluten Free Chickpea Lettuce Wraps


Gluten Free Chickpea Lettuce Wraps

Gluten Free Chickpea Lettuce Wraps

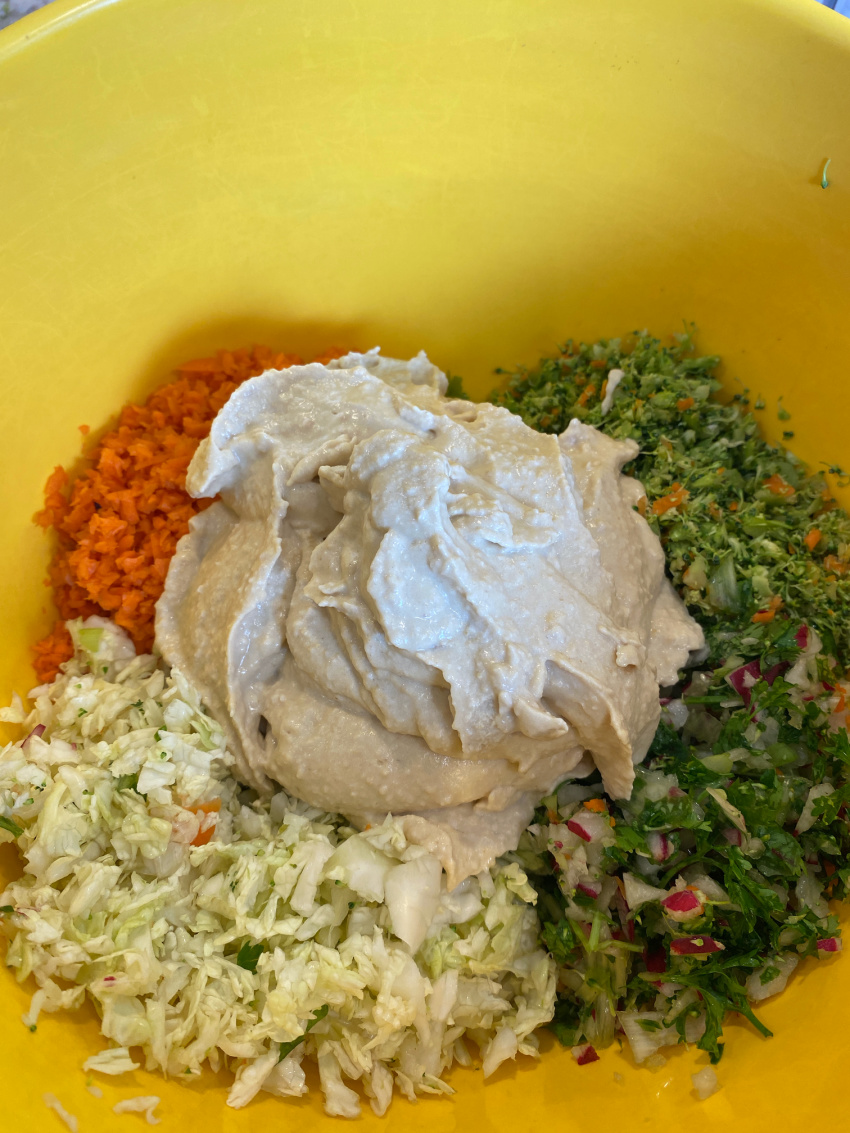
Add the hummus.

Gluten-Free Chickpea Lettuce Wraps

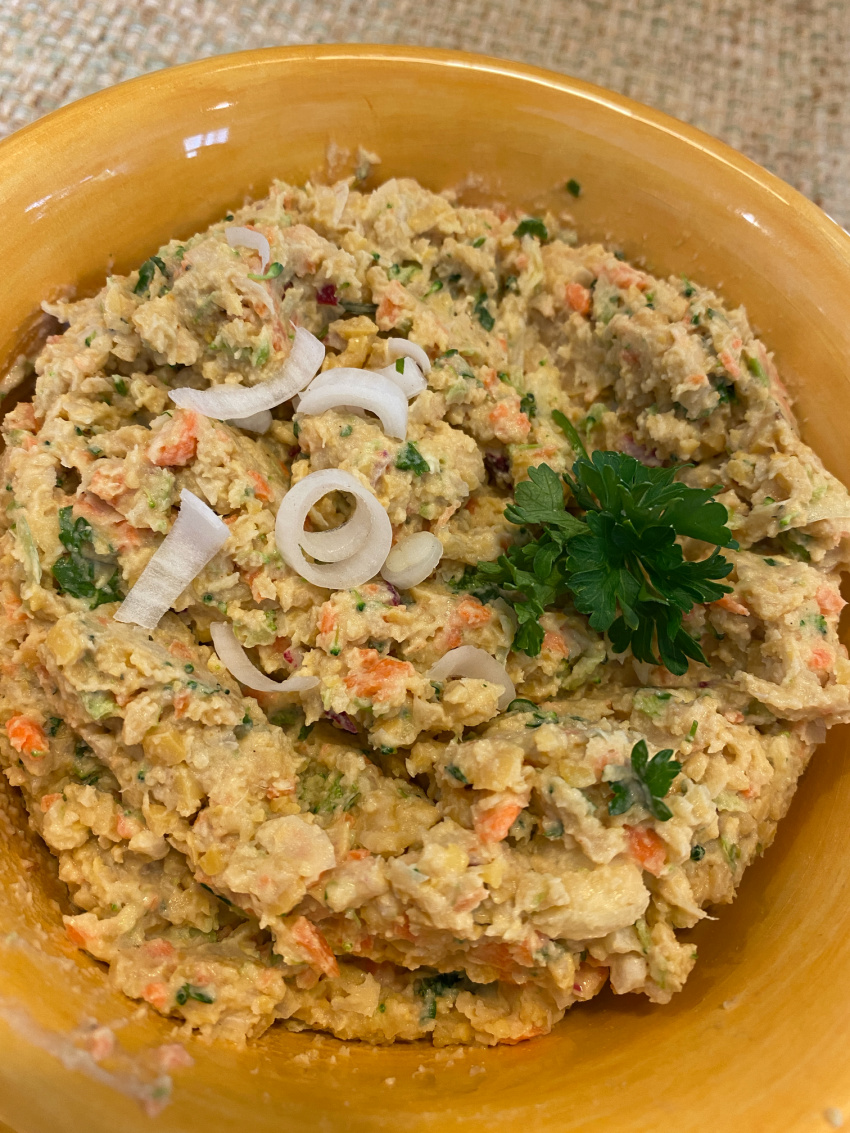
Stir and add your favorite salt-free seasoning (or salt if you use it).

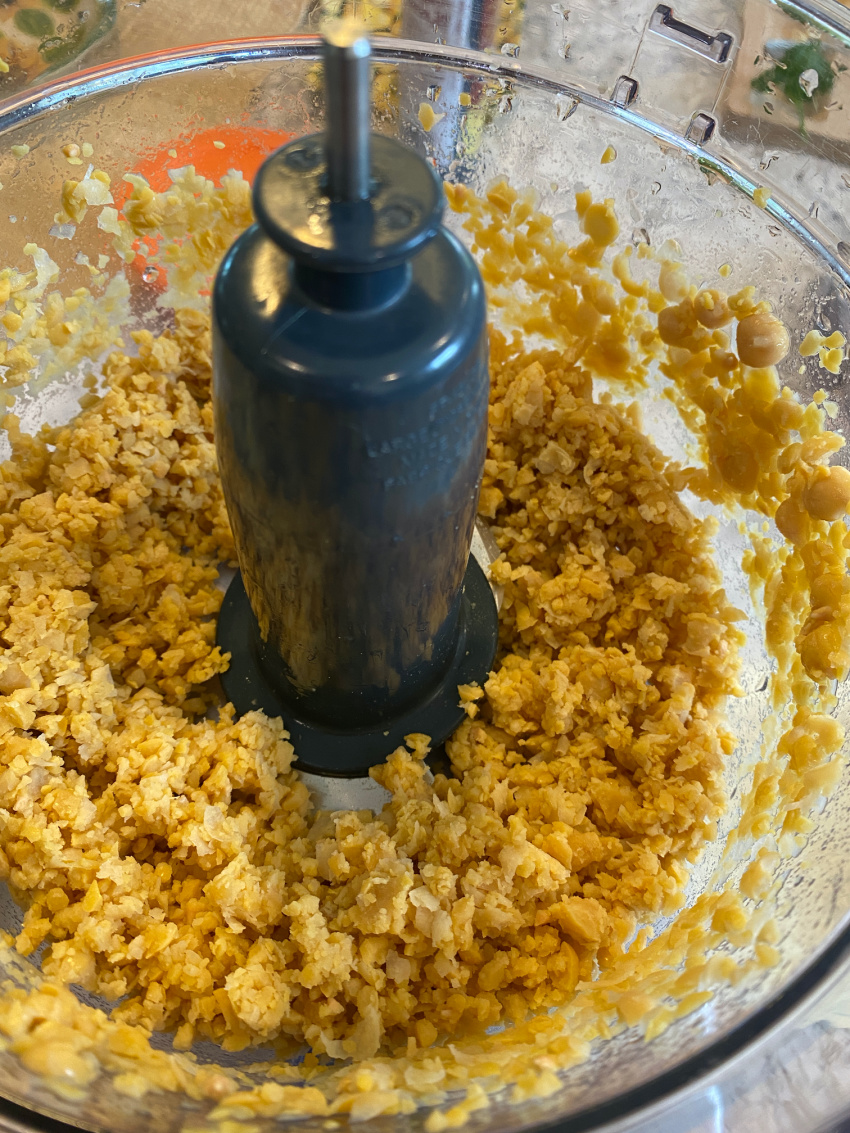
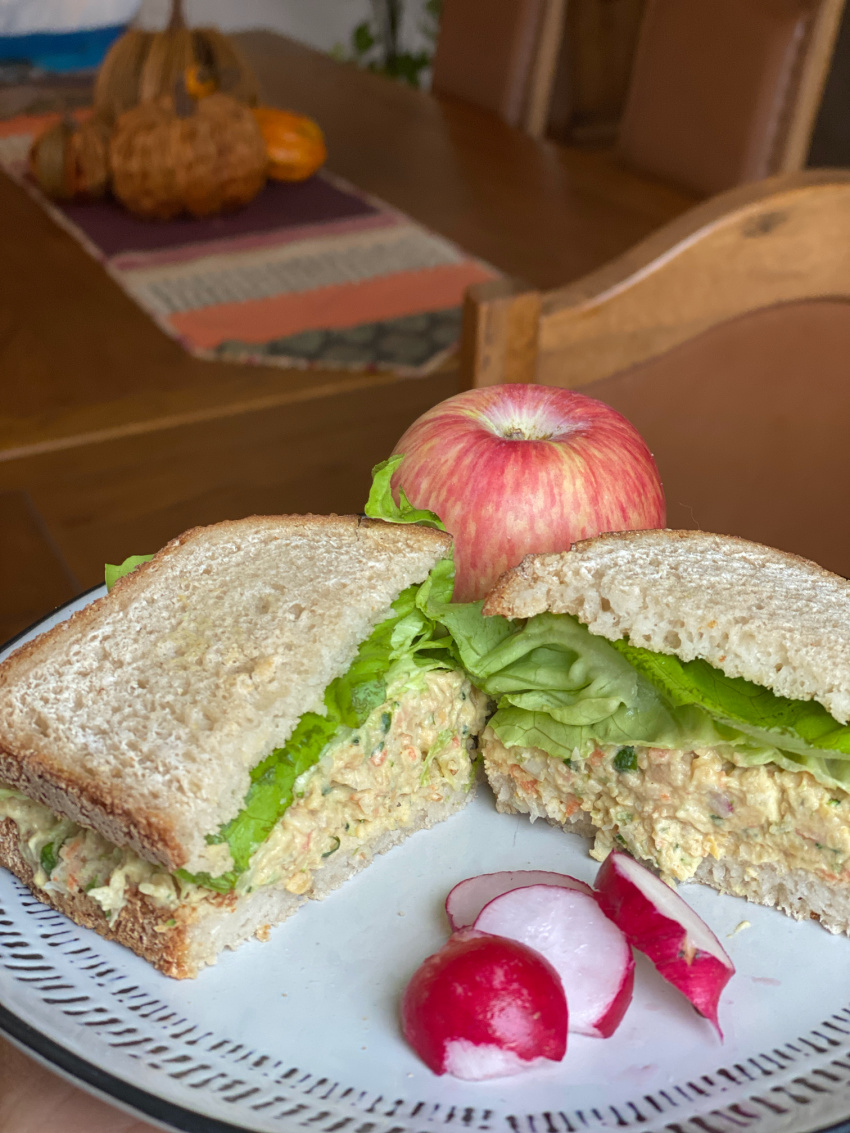
You can use this as is, for a dip or a wrap, or you can add another can of chickpeas that you have pulsed. This gives a thicker consistency that is good as a sandwich spread.


Gluten-Free Chickpea Lettuce Wraps


Gluten Free Chickpea Lettuce WrapsI did it both ways and really enjoyed the creamier batch in the lettuce wraps. I had the thicker version in a sandwich and that was great too!
Gluten-Free Chickpea Lettuce Wraps

Gluten Free Chickpea Lettuce Wraps
Print
Gluten Free Chickpea Lettuce Wraps

These Gluten-Free Chickpea Lettuce Wraps are packed full of veggies! The filling can be made into a delicious wrap, dip, or sandwich.

Course: Appetizer, Main Course, party, Snack
Cuisine: American, gluten-free
Keyword: gluten-free, Lettuce Wraps, Chickpea
Author: Trish Hall
Ingredients
For the hummus (if not using store-bought)
  • 1 15 oz can chickpeas (reserve the liquid aquafaba) about 1.5 cups cooked chickpeas
  • 1/4 cup lemon juice more depending on your tastes
  • 1/4 cup tahini Or sub with white beans
  • 1/2-1 tsp ground cumin
  • 1-2 tsp minced garlic I used two large cloves
  • salt to taste if using optional
Everything else:
  • 1 large carrot, cut into 1" chunks
  • 1 small crown of broccoli, cut into florets about a cup
  • 1/4 small cabbage, about a cup-sized wedge I used Savoy cabbage, but any would work
  • 1 cup cilantro, loosely packed big stems removed
  • 1 cup parsley, loosely packed big stems removed
  • 2 green onions, whites, and firm part of the green
  • 2-3 radishes
  • 1 15 oz can chickpeas this is optional
  • 1 cup hummus Recipe above, or store-bought
  • your favorite salt-free seasoning mix optional
Options for getting it to your mouth:
  • butterleaf or romaine lettuce
  • crackers
  • celery
  • sandwich bread
  • a spoon or fork 😋
Instructions
For the hummus (if not using store bought)
  1. In a small food processor bowl, add all the ingredients, except the reserved aquafaba

  2. Pulse until everything starts to mix well.

  3. Slowly add aquafaba and blend on high until you get the consistency that you want.

  4. You will need to stop and scrape down the sides a couple of times. Blend until very smooth.

  5. Set aside.

For the rest:
  1. Add the carrots to the food processor and pulse until they are about rice-sized. Add them to a large mixing bowl.

  2. Do the same to the broccoli. Add to the mixing bowl.

  3. Add the cilantro, parsley, green onions, and radishes. Pulse until rice-sized. Add to the mixing bowl.

  4. Add the cabbage to the food processor and pulse until finely chopped. Add to the mixing bowl.

  5. If you want the thicker version of this filling, pulse the other can of chickpeas until they are broken down into rice-sized pieces. Add this to the mixing bowl.

  6. Add the hummus to the mixing bowl on top of the chopped veggies and mix well.

  7. Add salt or salt-free seasoning, if using.

  8. Scoop onto lettuce leaves, or use as a dip with crackers or celery sticks. If you've made the thicker version, spread it onto bread and make a sandwich!

These Gluten-Free Chickpea Lettuce Wraps are packed full of veggies! The filling can be made into a delicious wrap, dip, or sandwich.


Filed Under: Main Dish, Potluck, Recipes, Snacks Tagged With: brunch, chickpea, Gluten-free, lunch, sandwich, Vegan, wraps

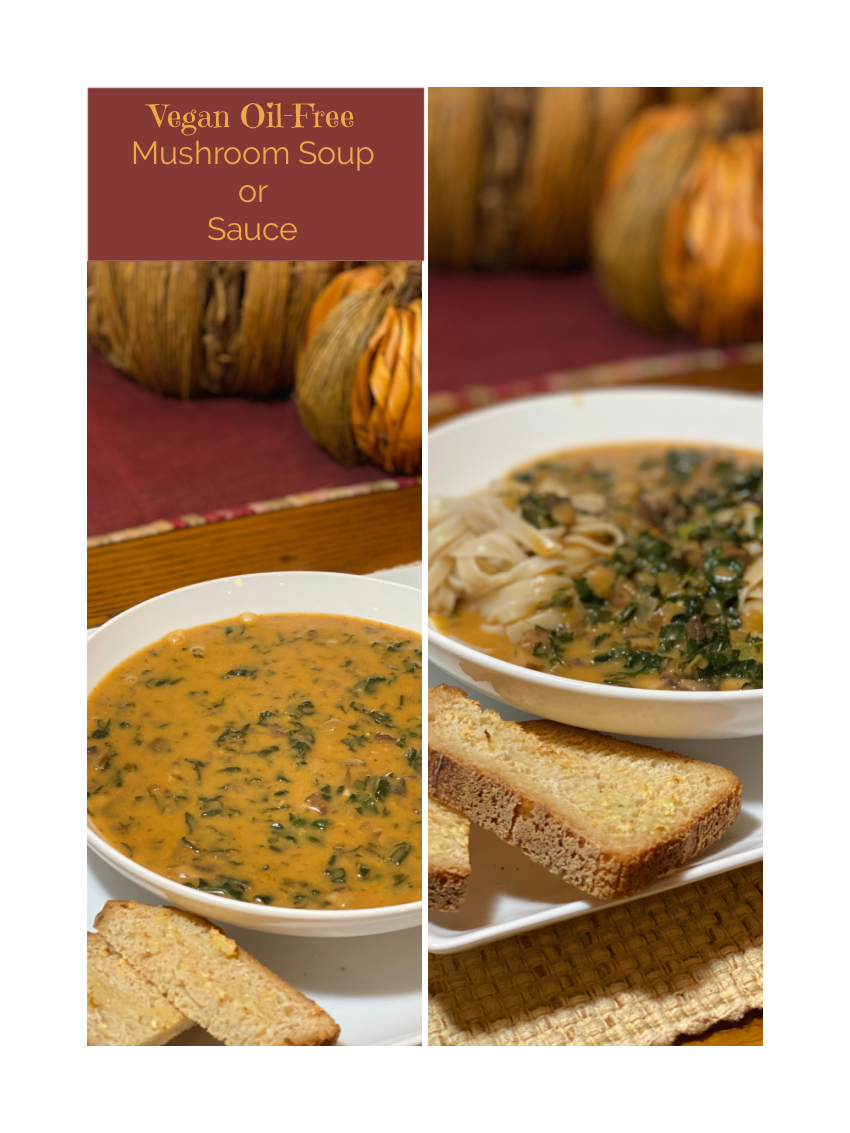
Vegan Oil-free Mushroom Soup or Sauce

September 1, 2021 by Trish Hall 1 Comment


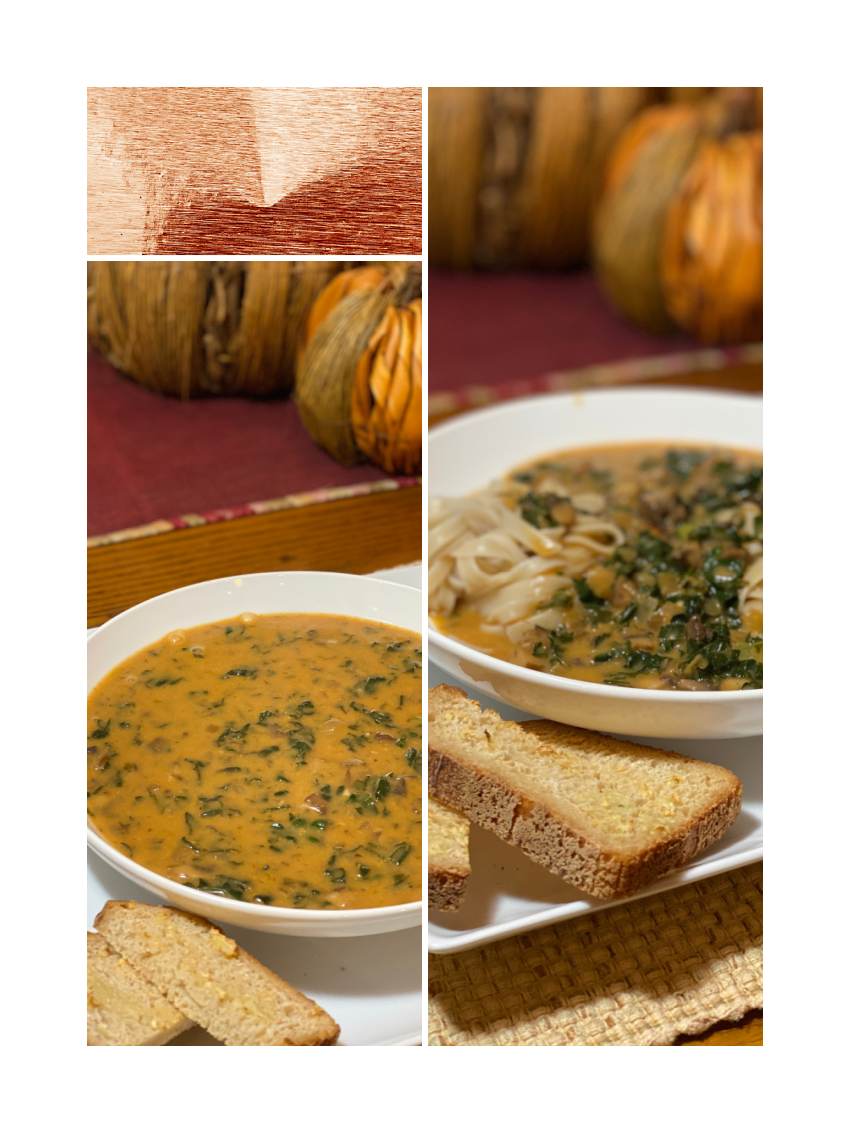
This Vegan Oil-free Mushroom Soup or Sauce is delicious as a soup with some crusty bread on the side or ladled over your favorite starch.

Vegan Oil-free Mushroom Soup or Sauce

I created this for the Instant Pot, but it works well cooked on the stovetop also.

If you are someone who likes to see pictures of the steps in a recipe, stay with me here. If you don’t need all the details, just fast-scroll down to the recipe box below.

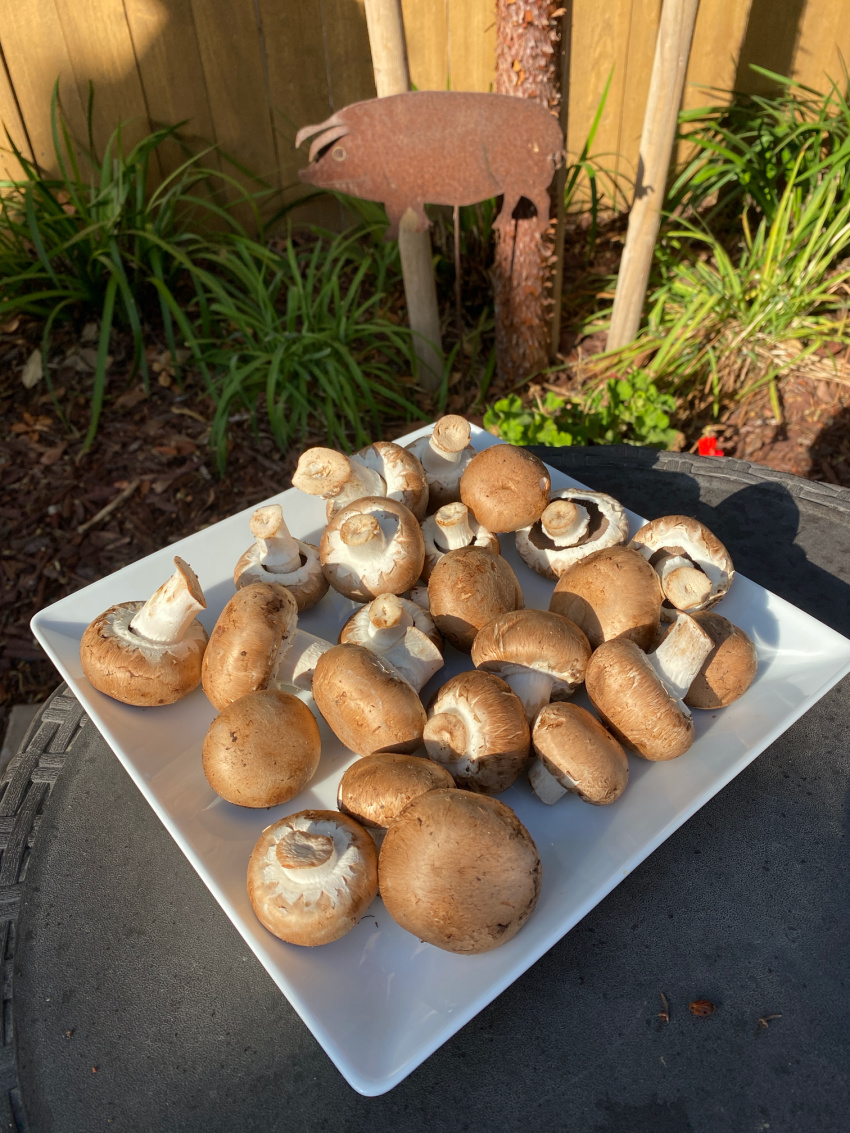
I like to put my mushrooms out in the sun to soak up some Vitamin D before I cook them. If you want to read about the science behind that, click here.

Vegan Oil-free Mushroom Soup or Sauce

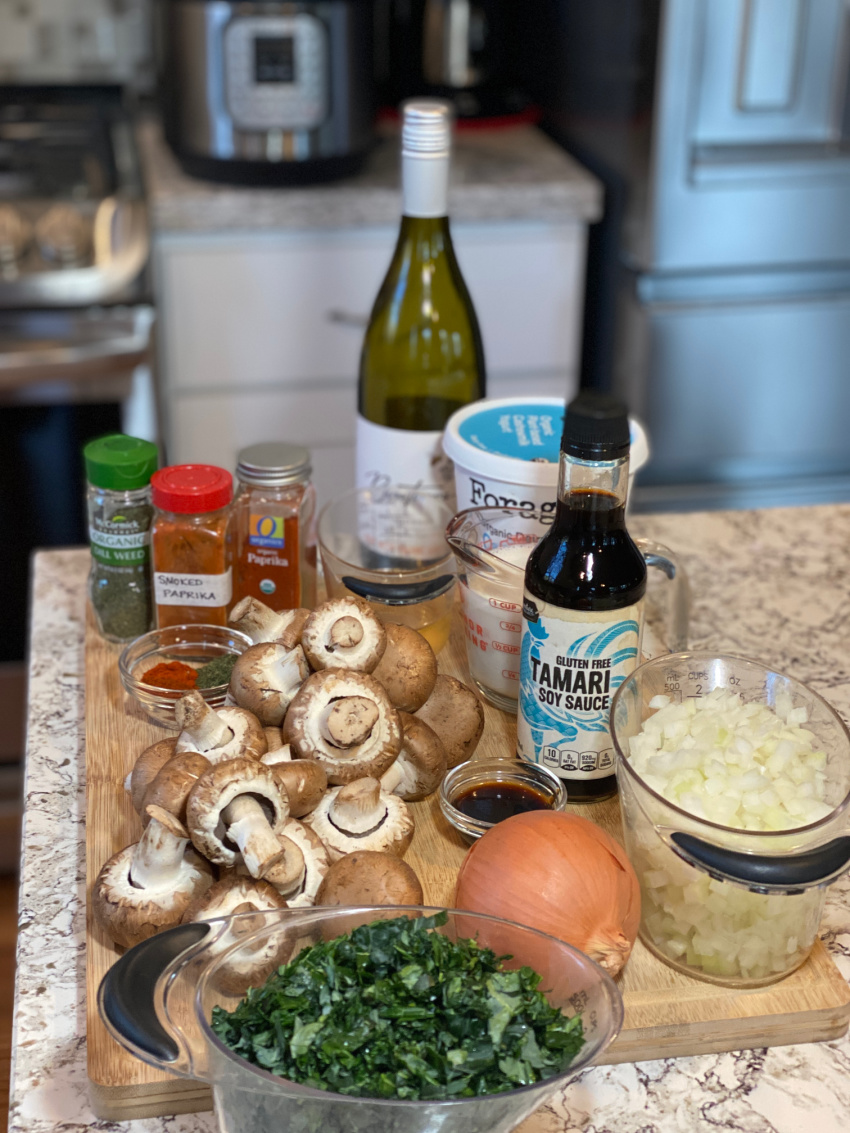
Gather your ingredients!

Vegan Oil-free Mushroom Soup or Sauce

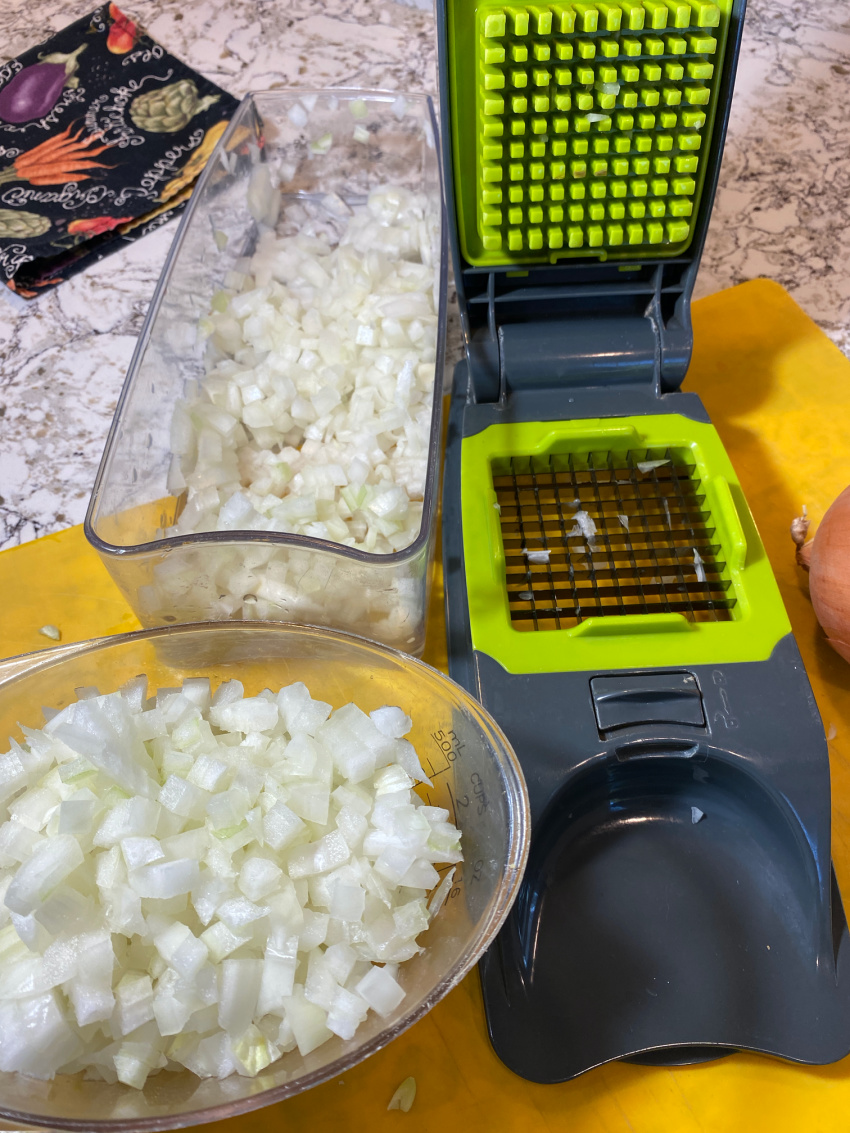
Chop your onions, mushrooms, and kale.

I use this chopper to cut the onions into 1/4″ pieces and the mushrooms into 1/2″ pieces. If you use that link to buy the chopper, I get a few cents at no additional cost to you. 

Vegan Oil-free Mushroom Soup or Sauce

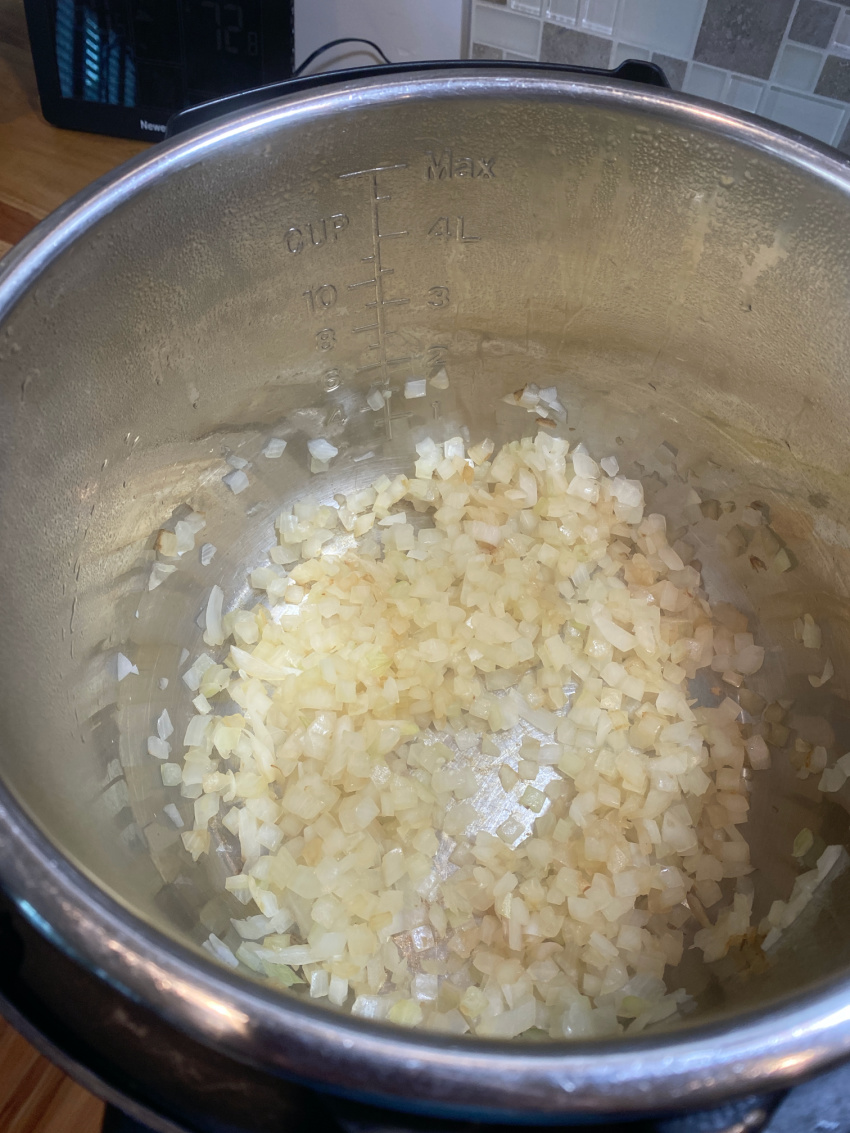
If you are using the Instant Pot, press the sauté button and add the onions. Sauté until they begin to caramelize.

Vegan Oil-free Mushroom Soup or Sauce

When the onions begin to carmelize, add the garlic and cook for another minute or so.

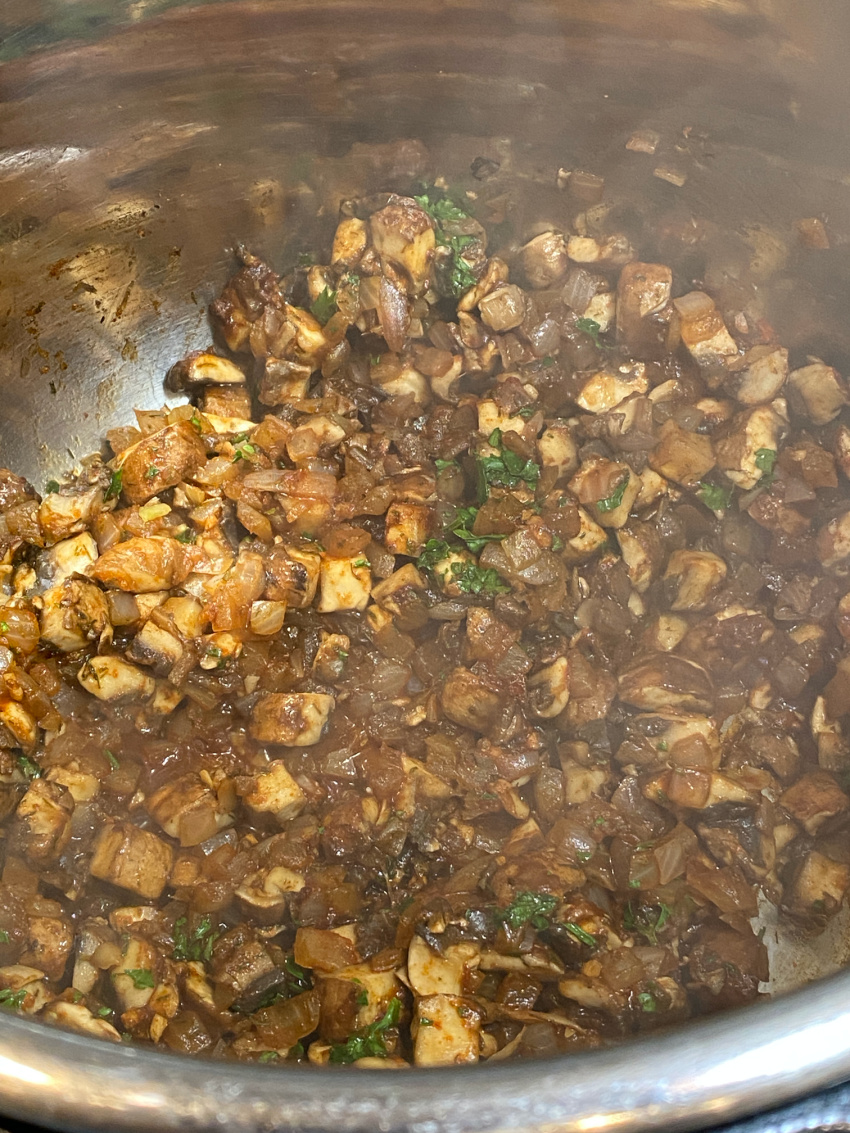
Add the mushrooms and continue to sauté, stirring occasionally until the water is mostly evaporated.

Add the dill weed, rosemary, paprikas, and salt and pepper, if using.

Stir well.

Vegan Oil-free Mushroom Soup or Sauce

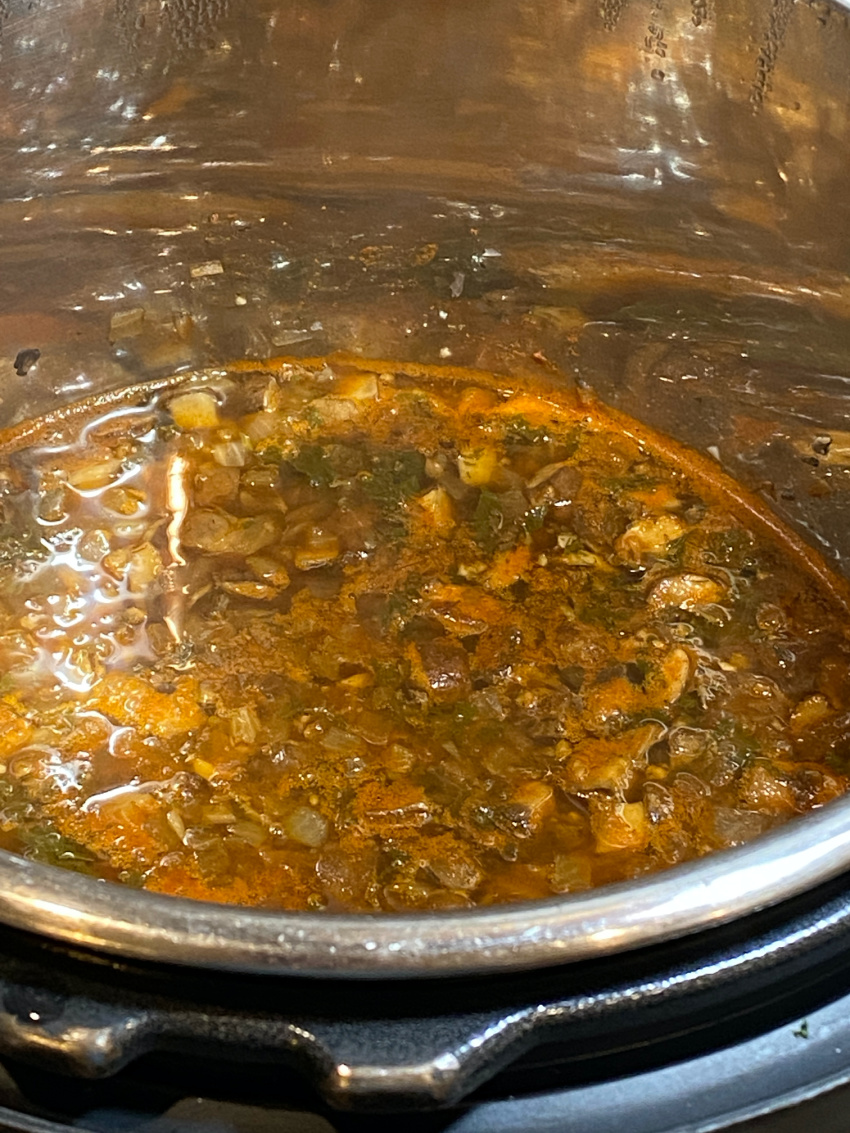
Cook for another minute and then add the tamari and parsley (if using). Add the wine (if using) and allow to simmer for about 5 minutes. This will cook off any alcohol. Add the broth.

Vegan Oil-free Mushroom Soup or Sauce

Turn off the Sauté feature and close the lid. Be sure the vent is turned to the sealing position. Manuel cook at high pressure for 1 minute and allow to come down from pressure naturally for about 10 minutes. Release any pressure and open carefully.

If you are cooking this on the stovetop, just bring to a boil and then turn the heat down to simmer and cover with a lid slightly cocked. Cook for about 5 minutes.

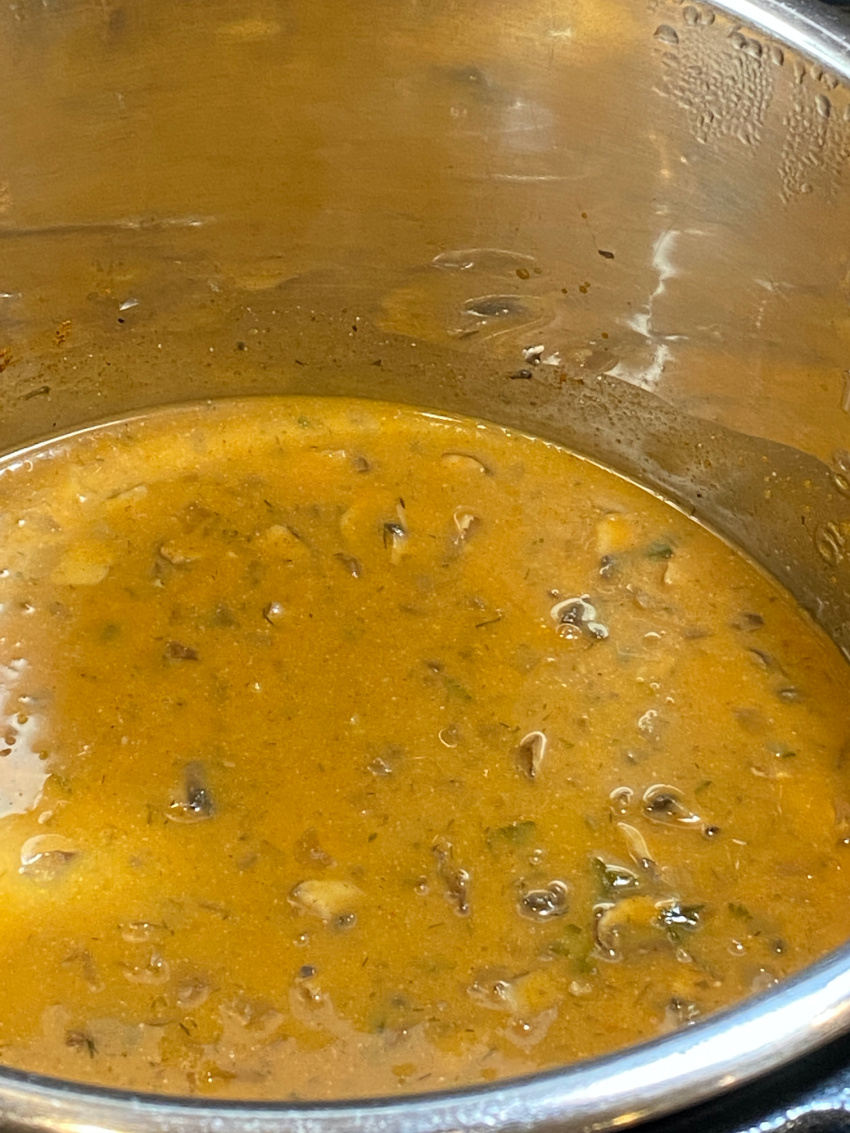
Mix the plant milk and arrowroot or cornstarch and add to the soup. Stir well for a few minutes.

Vegan Oil-free Mushroom Soup or Sauce

At this point I switched the Instant Pot to the slow cook option and let it cook for about an hour to really marry the flavors. You can skip this step and go right to the next and last step if you are in a hurry.

If adding the greens, stir them in during the last 5-10 minutes of cooking.

Just before serving, add the yogurt and lemon juice and stir.

Enjoy it as a soup, as is…or ladle it over your favorite starch as a sauce.


Print
Vegan Oil-free Mushroom Soup or Sauce

This Vegan Oil-free Mushroom Soup or Sauce is delicious poured over your favorite starch. I ladled it over brown rice when I created it and I think it would be really good over noodles or potatoes too. 

Course: Main Course, Sauce
Author: Trish Hall
Ingredients
  • 2 cups onions, chopped
  • 2-4 cloves garlic I used about 2 tsp minced
  • 1 lb portobello mushrooms, chopped in 1/2" pieces or use whatever kind you like
  • 1/3 cup dry (not sweet) white wine optional
  • 2 tsp dried dill weed or 1-2 tablespoons fresh dill weed finely chopped
  • 1-2 tsp fresh, minced rosemary 1/4-1/2 tsp dried rosemary
  • 1 Tbsp paprika (can use hot paprika)
  • 1-2 tsp smoked paprika
  • 1 tsp salt (optional)
  • ground black pepper to taste
  • 1/4 cup fresh parsley, chopped optional
  • 1 Tbsp tamari (can use soy sauce if gluten is not an issue)
  • 2.5 cups veggie broth Can increase if you like the soup thinner
  • 1 cup plant milk (I used almond)
  • 3 tbsp arrowroot (or cornstarch)
  • 1/2 cup plant yogurt (I used Forager cashew yogurt)
  • 2-3 cups chopped greens (I used collard greens) optional
  • 1 tbsp lemon juice optional
Instructions
  1. If using the Instant Pot, select the sauté button and allow it to heat.

    Add onions and sauté until they begin to caramelize.

  2. Once the onions are beginning to caramelize, add the garlic and cook for another minute or so.  Add the mushrooms and continue to sauté until they are cooked down and the water is mostly evaporated. Add the dill weed, rosemary, paprikas, and salt and pepper (if using) and stir well. Continue to sauté for a minute and then add the tamari and parsley (if using). Add the wine (if using) and allow to simmer for about 5 minutes. This will cook off any alcohol. 


  3. Add the broth, turn off the sauté feature and close the lid. Be sure the vent is turned to the sealing position. 

    Manual cook at high pressure for 1 minute. Allow it to come down from pressure naturally for about 10 minutes. Release any pressure and open carefully. 

    If using the stovetop, just bring it to a boil and then lower the heat to a low simmer.

  4. Mix the plant milk and arrowroot (or cornstarch) and add to the soup. Stir well for a few minutes.

    At this point, I switched to the slow cook option and just let it cook for about an hour to really marry the flavors. You could probably skip this and go right to the next and last step if you are in a hurry. 

    If adding greens, stir them in during the last 5-10 minutes of cooking

  5. Just before serving, add the yogurt and lemon juice (if using) and stir.

  6. Enjoy as a soup, as is...or ladle over your favorite starch as a sauce.

This Vegan Oil-free Mushroom Soup or Sauce is delicious as a soup with some crusty bread on the side or ladled over your favorite starch.


Filed Under: Main Dish, Recipes, Sauces Tagged With: Gluten-free, Instant Pot, Mushrooms, Oil free, sauce, Soup, Stovetop, Vegan

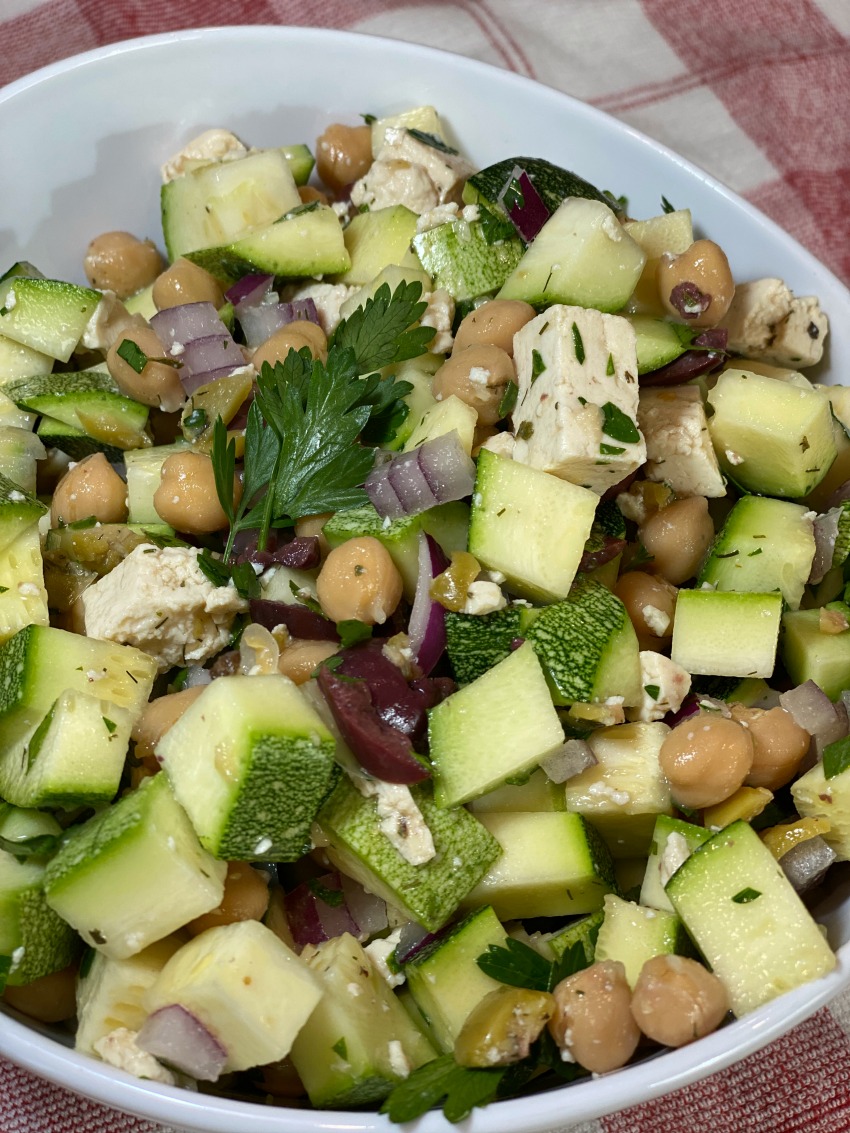
Greek Zucchini Salad with Vegan Feta

September 8, 2020 by Trish Hall 2 Comments

This Greek Zucchini Salad with Vegan Feta is a healthy and tasty way to use zucchini. It can be made a day ahead, so it’s perfect for parties!

Greek Zucchini Salad with Vegan Feta


It’s that time of year when your garden is cranking out zucchini faster than you can use it or sneak it over to the neighbor’s front porch. 😆

…

Read More

Filed Under: Main Dish, Recipes, Salad, Side Dishes Tagged With: garden abundance, Gluten-free, No oil, Oil free, summer veggies, Vegan, vegan cheese, vegan feta, Zucchini

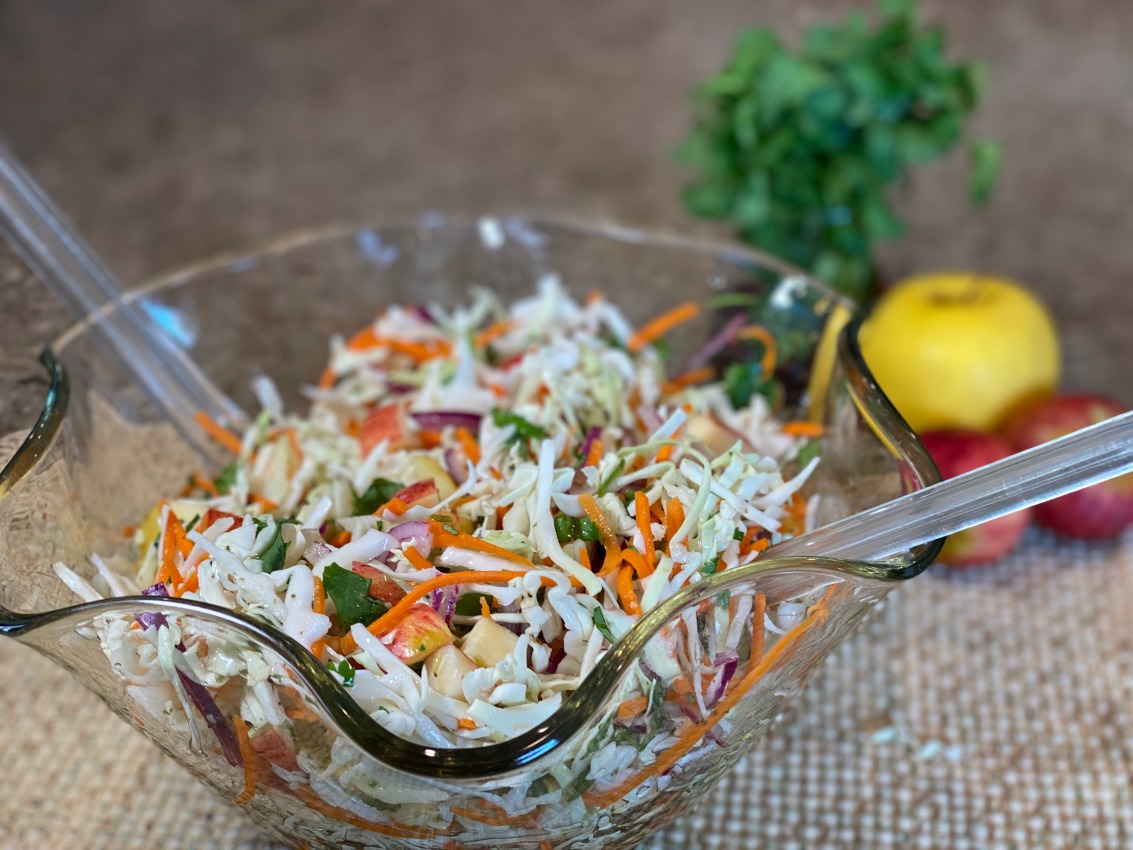
Oil-Free Cabbage and Apple Slaw

August 27, 2020 by Trish Hall 8 Comments

If you’re looking for an alternative to the typical creamy fat-laden coleslaw, this Oil-Free Cabbage and Apple Slaw will delight you!

Oil-Free Cabbage and Apple Slaw

The sweetness of the apples is a nice compliment to the tartness of the vinegar. I used a combination of a cilantro balsamic and apple cider vinegar, but you could use either one alone or any other of your favorite kinds of vinegar. I’m in love with California Balsamics vinegar so check them out if you haven’t already done so. (I’ll put a link to their website in the recipe notes.)  If you use just straight vinegar and no balsamic, you’ll want to add a little bit of sweetener to cut the sharpness of the acid. Maple syrup works well for this.

…

Read More

Filed Under: Potluck, Recipes, Salad, Side Dishes Tagged With: apple, cabbage, coleslaw, Gluten-free, No oil, Oil free

Next Page »

Primary Sidebar

About Me

  Hi, I'm Trish! Are you looking for delicious plant-based, oil-free, gluten-free recipes? Maybe you’re new to the vegan whole foods way of eating and need some guidance? Do you have some health problems that you are hoping to reverse? No meat, no dairy, no gluten, no oil...what’s left?!? So much ...

Read More

Categories

  • Appetizers
  • Articles
  • Breakfast
  • Condiments
  • Desserts
  • Holiday
  • How Do I…?
  • Instant Pot
  • Main Dish
  • Mexican
  • Potatoes
  • Potluck
  • Quick and Easy
  • Recipes
  • Salad
  • Sauces
  • Side Dishes
  • Snacks
  • Soup
  • Start Here

Recent Posts

  • Quick Vegan Bulgogi Sauce
  • Oil-free Asian Salad with Chickpeas
  • Seedy Flax Crackers~Oil-Free & Gluten-Free
  • Vegan Ceviche
  • Vegan Sausage and Apple Stuffed Butternut Squash

Tags

apples Asian Beans Beets Black bean breakfast to go brunch chickpea chili chocolate chocolate chip coleslaw cookies Corn Creamy dairy-free dark chocolate egg-free Gluten-free Instant Pot Kale Mason Jar meals Mushrooms No oil nut-free Oil free peanut butter Pinto Beans Plant based Potato Potatoes potluck pudding Quinoa Refried Beans Salad sauce Sauerkraut Soup Sweet Potato Vegan vegan breakfast vegan cheese Zoodles Zucchini

Your Mom’s Vegan is a participant in the Amazon Services LLC Associates Program, an affiliate advertising program designed to provide a means for sites to earn advertising fees by advertising and linking to Amazon.com.

Copyright © 2025 · Foodie Pro & The Genesis Framework